Author: Alex Hales

  • How to Start a Garden in Your Backyard: Guide to Growing Success

    How to Start a Garden in Your Backyard: Guide to Growing Success

    Dreaming of fresh veggies, vibrant flowers, or a peaceful green retreat right outside your door? Learning how to start a garden in your backyard is easier than you think! This step-by-step guide is designed with you—the home gardener—in mind, offering practical tips to transform your backyard into a thriving oasis. No matter your experience level, you’ll find everything you need to get growing. Let’s dig in and make your gardening journey a success!

    Why You Should Start a Garden in Your Backyard

    Gardening isn’t just about plants—it’s about you. Imagine stepping outside to pick ripe tomatoes for dinner, snipping fresh herbs for a recipe, or unwinding amidst blooming sunflowers. By mastering how to start a garden in your backyard, you’ll enjoy lower grocery bills, a healthier lifestyle, and the pride of nurturing something from seed to harvest. Plus, it’s a fun way to spend time outdoors, whether you’re solo or with family.

    Step 1: Plan Your Perfect Backyard Garden

    Before you grab a shovel, let’s plan a garden that fits your life. Here’s how to begin:

    Pick a Spot That Works for You

    Look for a place in your backyard with 6-8 hours of sunlight—perfect for most plants. Make sure it’s near a water source (no one wants to lug buckets across the yard!) and has decent drainage. If you’re short on space, don’t worry—containers or raised beds can work wonders.

    Choose Plants You’ll Love

    What do you want to grow? If you’re a foodie, try cucumbers, peppers, or basil. Love color? Go for zinnias or daisies. Check your local growing zone online to pick plants that thrive where you live. Start with a few favorites to keep it manageable. Juicy Purple Tomatoes are considered a good choice for an organic lover.

    Size It to Your Needs

    How much time do you have? A 4×4-foot plot is great if you’re busy, while a bigger space suits avid gardeners. Sketch a simple layout—put taller plants like corn in the back and shorter ones like lettuce up front. This keeps your garden user-friendly and beautiful.

    Plan Your Perfect Backyard Garden

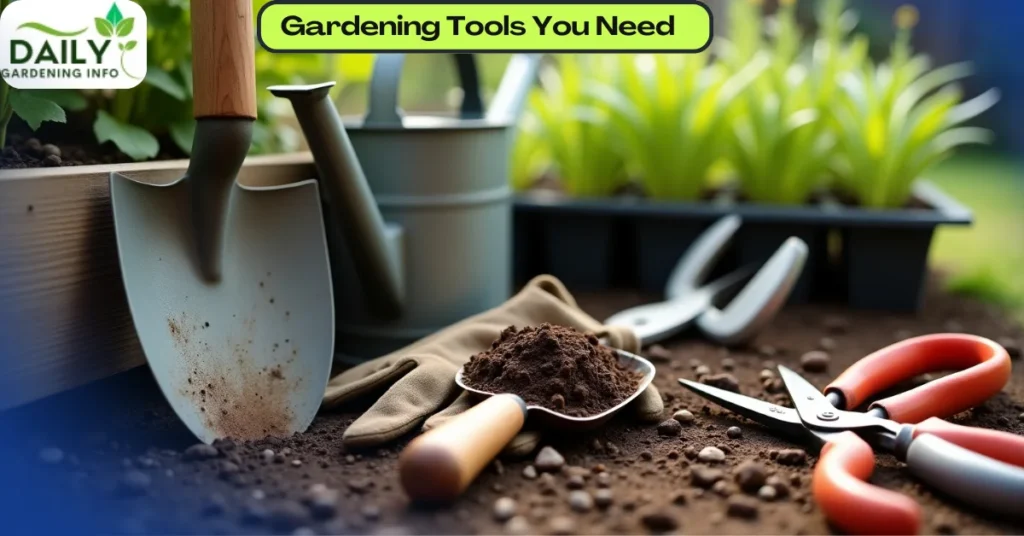
    Step 2: Gather Tools You’ll Actually Use

    You don’t need a shed full of gear—just a few essentials to make gardening fun and easy:

    • Shovel: For digging beds or turning soil.
    • Hand trowel: Perfect for planting your seedlings.
    • Watering can: Gentle on young plants (or use a hose if that’s more your speed).
    • Gloves: Keep your hands clean and blister-free.
    • Pruning shears: Handy for trimming as your garden grows.

    Pick tools that feel comfortable in your hands—quality matters more than quantity when you’re learning how to start a garden in your backyard.

    Gardening Tools

    Step 3: Get Your Soil Ready for Success

    Good soil means happy plants, and you’re the one who’ll make it happen. Here’s how:

    Test It Yourself

    Grab a soil test kit from a garden store or online. It’ll tell you the pH (aim for 6.0-7.0) and what nutrients your soil needs. This step saves you guesswork and ensures your plants thrive.

    Boost It Your Way

    Mix in compost from your kitchen scraps, aged manure, or store-bought organic matter. It’s like giving your soil a superfood smoothie! Work it in with your shovel until it’s loose and crumbly—your plants will thank you.

    Clear the Clutter

    Spend a few minutes pulling weeds and tossing rocks. A clean slate means your carrots or roses won’t have to fight for space or nutrients.

    Step 4: Plant with Confidence

    This is where the magic happens—you’re bringing your garden to life!

    Seeds or Seedlings: Your Choice

    Seeds are budget-friendly and satisfying (think radishes sprouting in weeks), while seedlings give you a jumpstart (like tomato plants ready to grow). Pick what fits your patience level and schedule.

    Space It Right

    Check the seed packet or plant tag—crowded plants struggle. Give zucchini room to sprawl and herbs a cozy corner. You’ll love how organized it looks!

    Water Like a Pro

    After planting, give your new babies a gentle drink. Keep the soil damp (not soggy) for the first week or two while they settle in.

    If you’re in love with mums or chrysanthemums, don’t miss this simple growing guide made just for you — check it out here!

    Step 5: Care for Your Garden, Your Way

    You’ve planted—now keep it growing with simple habits tailored to your routine.

    Water When It Suits You

    Most plants need about an inch of water weekly. Water in the morning before your day gets busy—it’s better for the plants and fits your schedule. Use a rain gauge to track it if you’re curious!

    Care For Your Backyard Garden

    Weed on Your Terms

    Spend 10 minutes a week pulling weeds, or spread mulch (like straw or bark) to cut down the work. You’ll keep your garden looking tidy without breaking a sweat.

    Feed Your Plants

    Every month or so, sprinkle some organic fertilizer or toss on more compost. It’s like a treat for your plants—and you’ll see the difference in their growth.

    Step 6: Protect What’s Yours

    You’ve worked hard—don’t let pests or weather steal your harvest!

    Keep Pests at Bay

    Plant marigolds near your veggies—they’re pretty and repel bugs. Got aphids? A spray of soapy water or neem oil is your quick fix. It’s all-natural and safe for your garden.

    Guard Against Critters

    If bunnies or deer visit, a low fence or netting keeps them out. You’ll feel like a backyard hero protecting your lettuce patch!

    Weather-Proof Your Plants

    Frost coming? Toss a blanket or row cover over your garden. Too much rain? Move potted plants under cover. You’re in control.

    Step 7: Harvest and Celebrate Your Wins

    The best part of how to start a garden in your backyard? Enjoying what you’ve grown! Pick green beans when they’re tender, snip herbs for tonight’s meal, or cut flowers for your table. Share with neighbors or freeze extras—your hard work pays off.

    Extra Tips Just for You

    • Start Small: A tiny plot builds your confidence.
    • Track It: Jot notes in a journal or app—what worked, what didn’t.
    • Ask Around: Chat with local gardeners or browse online forums for ideas tailored to your area.

    Common Questions You Might Have

    How Much Time Will It Take?

    For a small garden, 2-3 hours a week is plenty. You’ll spend more upfront, but it gets easier.

    What If I Have No Experience?

    No problem! Start with forgiving plants like peas or marigolds—they’re practically foolproof.

    Can I Garden in a Small Backyard?

    Absolutely! Use pots, vertical planters, or a raised bed. You’ll be amazed at what fits.

  • How to Plant, Grow, and Maintain Your Bleeding Heart Plant

    How to Plant, Grow, and Maintain Your Bleeding Heart Plant

    The Bleeding Heart Plant, scientifically known as Lamprocapnos spectabilis, is a cherished perennial flowering plant from the poppy family, Papaveraceae. Native to Siberia, Northern China, Korea, and Japan, this stunning plant boasts captivating crimson and white blooms that appeal to both novice and experienced gardeners.
    In this comprehensive guide, you’ll discover the Bleeding Heart’s unique characteristics, ideal growing conditions, propagation techniques, container gardening tips, sustainable blooming practices, solutions to common problems, and creative design ideas to cultivate this elegant plant in your garden.

    Characteristics of Bleeding Heart

    The Bleeding Heart (Lamprocapnos spectabilis) is renowned for its heart-shaped flowers that dangle like droplets, resembling a “bleeding” effect. These blossoms typically feature vibrant pink or red outer petals with delicate white inner petals, reminiscent of hummingbird mint plants.
    This herbaceous perennial grows to a height of 2 to 3 feet and spreads 18 to 24 inches wide. Its fern-like, light-green foliage adds a soft texture to gardens. The Bleeding Heart naturally dies back in late fall to early winter (November to December in temperate climates) and reemerges in spring, typically between March and April, making it a seasonal favorite.

    Characteristics of Bleeding Heart

    Ideal Growing Conditions for Bleeding Heart

    To thrive, the Bleeding Heart requires conditions mirroring its native woodland habitats.

    Light Requirements

    This plant excels in shaded or partially shaded areas, making it an excellent choice for woodland gardens or shaded yard corners with filtered sunlight. While it tolerates full sun, excessive exposure can scorch its leaves and diminish blooming. For optimal growth, provide 2-4 hours of filtered sunlight daily in a partial shade setting.

    Soil Preferences

    The bleeding heart prefers acidic to neutral, well-drained soil that retains moisture without becoming waterlogged. Enriching the soil with organic matter, such as compost or farmyard manure, boosts fertility. Aim for a soil pH between 6.0 and 7.0 to ensure a healthy, thriving plant.

    Temperature and Humidity

    Adaptable to USDA zones 3 to 9, the Bleeding Heart suits diverse climates, from Texas to southern California. It flourishes in cool temperatures between 60°F and 75°F (15°C to 24°C). Maintain soil moisture at 50-60% by watering when the top 1-2 inches of soil feel dry, especially during warmer months like May to August.

    Growing Conditions for Bleeding Heart

    Tips for Propagating Bleeding Heart

    Propagating the Bleeding Heart is straightforward using division or cuttings, allowing you to multiply its beauty across your garden or share with others.

    A: Propagation Through Division

    When to Do It: Spring (April to May) or fall (September to October) offers cooler temperatures that minimize plant stress and promote rooting.
    How to Do It:

    1. Gently dig up clumps of the Bleeding Heart, taking care not to harm the roots.
    2. Using a sanitized sharp knife or spade, divide the roots into sections, ensuring each has roots and at least one healthy shoot.
    3. Replant divisions 18 to 24 inches apart in prepared soil to allow air circulation and nutrient access.
    4. Water thoroughly to settle the soil around the roots.
    Propagation of Bleeding Heart

    B: Propagation Through Cuttings

    When to Take Cuttings: Early summer (around June) is ideal. Select healthy Bleeding Heart stems and cut 4- to 6-inch sections just below a leaf node, where rooting hormones are concentrated.
    How to Do It:

    1. Remove lower leaves with a pruner to expose nodes and prevent rot.
    2. Plant cuttings in a 4- to 6-inch pot filled with a well-draining mix (e.g., potting soil with perlite or sand).
    3. Water generously and maintain consistent moisture, using a plastic bag or humidity dome to retain humidity.
    4. Position the pot in indirect light; roots should form within 4 to 6 weeks.

    Additional Tips

    • Soil Requirements: Use well-draining, organic-rich soil. Add 1-2 inches of compost for enhanced fertility.
    • Care After Propagation: Monitor water needs and watch for pests like aphids or mealybugs, treating with insecticidal soap or neem oil if necessary.

    Step-by-Step Guide: Growing Bleeding Heart in a Container

    Growing bleeding heart in containers is perfect for small spaces like patios or balconies, offering flexibility and charm.

    1. Choose a Pot: Select a container at least 12 inches wide with drainage holes.
    2. Prepare the Soil: Use a well-draining potting mix enriched with compost.
    3. Planting: Position the Bleeding Heart so its crown sits at soil level.
    4. Fill the Pot: Add soil around the roots, leaving space at the top for watering.
    5. Water: Water thoroughly after planting, keeping soil evenly moist but not soggy.
    6. Placement: Place the pot in a shady or partially shaded spot.
    7. Care: Water regularly, ensure proper drainage, and apply mulch (e.g., shredded bark or straw) to retain moisture.

    Keeping Bleeding Heart Blooming

    Regular Care Tips

    To sustain vibrant Bleeding Heart blooms, remove faded flowers to encourage new growth, though deadheading isn’t essential. Apply a balanced, slow-release fertilizer (10-10-10 N-P-K) in early spring to support development.

    Seasonal Attention Tips

    • Spring: Monitor new growth from March to April after the last frost.
    • Summer: Protect from heat during June to August with afternoon shade and consistent watering.

    Common Problems & Solutions for Bleeding Heart

    Pest Infestations

    The Bleeding Heart may attract slugs, aphids, and spider mites. Slugs chew leaves, aphids sap plant vitality, and spider mites cause yellowing with fine webs.

    • Solution: Apply insecticidal soap (2 tablespoons per gallon of water) or neem oil (1-2 tablespoons per gallon) to affected areas. Spray in the early morning or evening, repeating every 7-14 days as needed.

    Disease Infections

    Powdery mildew, a fungal issue, appears as a white coating on leaves from May to July.

    • Solution: Improve air circulation, avoid overhead watering, and use fungicides like sulfur or neem oil if necessary.

    Design Ideas for Bleeding Heart

    • Border Planting: Line pathways or fill gaps with Bleeding Heart for a graceful, flowing effect.
    • Container Gardening: Grow in pots for patios or balconies, ensuring ample space and drainage.
    • Companion Planting: Pair with hummingbird mint to attract pollinators and enhance garden biodiversity.

    Conclusion

    The Bleeding Heart is a breathtaking addition to any garden, blending delicate beauty with resilience. With proper care—shaded conditions, well-drained soil, and regular maintenance—this plant thrives for years, adding warmth and elegance to spring landscapes. Whether in borders, containers, or paired with other plants, the bleeding heart elevates shaded spaces with timeless charm.