Author: [email protected]

  • 50+ Types of Flowers: The World Favourite!

    50+ Types of Flowers: The World Favourite!

    Flowers are nature’s storytellers, each with a unique charm, purpose, and meaning. With over 65 types of flowers to explore, any gardener and flower enthusiast can find the perfect bloom for every occasion—whether it’s a wedding, a heartfelt apology, or a simple “I love you.”

    In this guide, we’ll uncover the specialties of some standout flowers, the events they shine at, and the emotions they convey. Let’s dive into the blooming world of floral wonders!

    Why Flowers Speak Volumes

    Across the USA, flowers do more than beautify gardens—they carry messages. From the Victorian era’s “language of flowers” to modern-day bouquets, each type has a specialty that makes it unforgettable. Whether you’re planting them in your backyard or gifting them, knowing their meanings and uses can elevate your floral game.

    Flowers Speak Volumes

    65+ Types of Flowers with Specialties, Occasions, and Meanings

    Here’s a look at some of the most iconic flowers, their standout traits, the events they’re perfect for, and what they symbolize. I’ve included a few of my favorites to inspire your next gardening or gifting choice!

    1. Roses

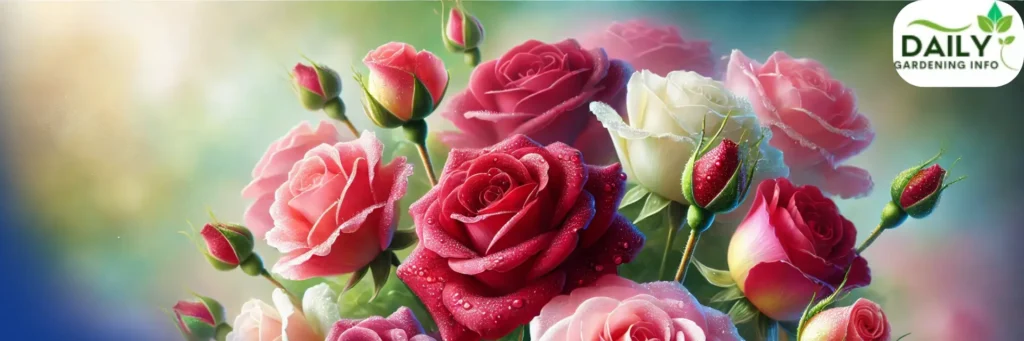
    • Specialty: Lush petals in endless colors—red, pink, white, and beyond.
    • Occasion: Weddings, anniversaries, Valentine’s Day.
    • Symbolism: Red roses scream love and passion; white roses whisper purity and remembrance.
    • Gardening Tip: Plant in full sun and prune annually for robust blooms.

    2. Sunflowers

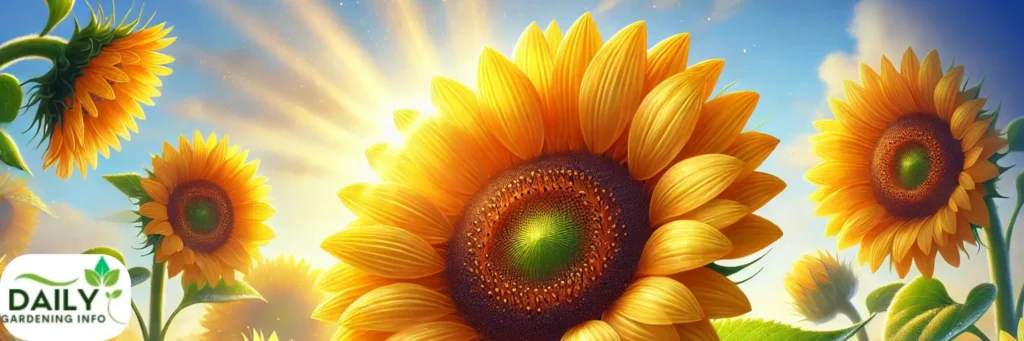
    • Specialty: Towering stems with huge, sunny faces that track the sun.
    • Occasion: Summer barbecues, housewarmings, casual celebrations.
    • Symbolism: Happiness, loyalty, and optimism.
    • Gardening Tip: Sow seeds in spring for a cheerful July harvest.

    3. Tulips

    Tulip flower
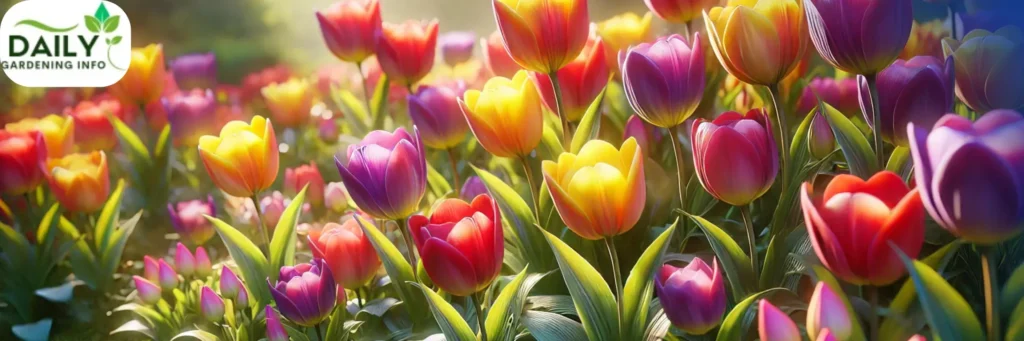
    • Specialty: Sleek, cup-shaped blooms in vibrant hues.
    • Occasion: Spring weddings, Easter, or new beginnings.
    • Symbolism: Perfect love (red), forgiveness (white), or royalty (purple).
    • Gardening Tip: Plant bulbs in fall for a stunning April show.

    4. Daisies

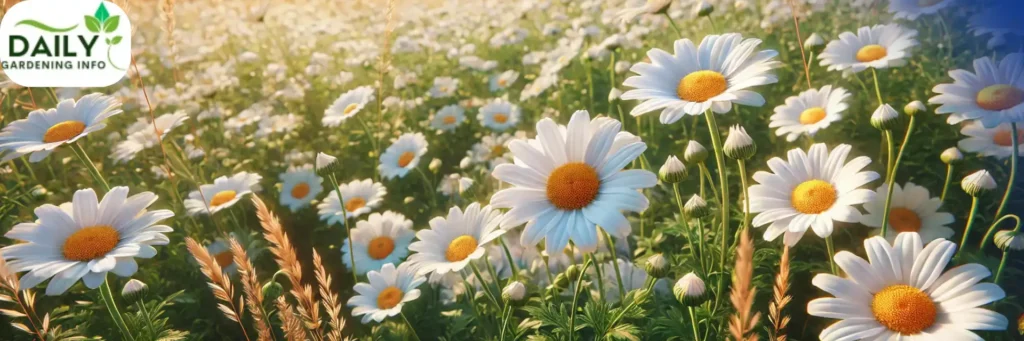
    • Specialty: Simple, star-like petals with a sunny center.
    • Occasion: Birthdays, get-well-soon gifts, picnics.
    • Symbolism: Innocence, purity, and cheerful affection.
    • Gardening Tip: Deadhead to keep them blooming all summer.

    5. Lavender

    lavender flower
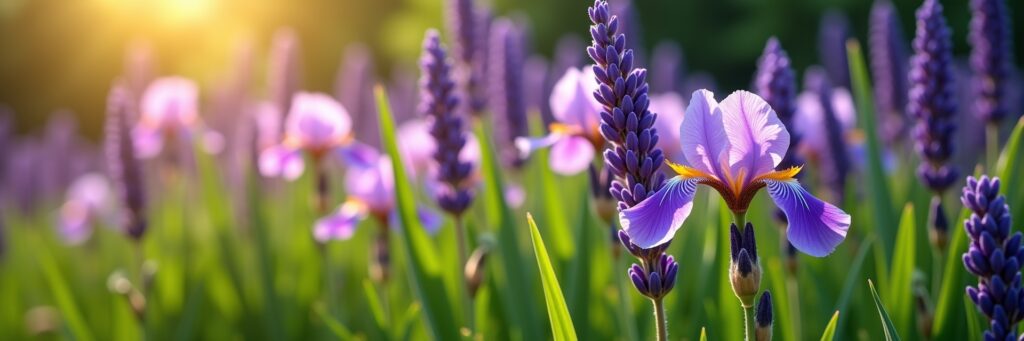
    • Specialty: Fragrant purple spikes that soothe the senses.
    • Occasion: Spa days, thank-you gifts, relaxation-themed events.
    • Symbolism: Calmness, devotion, and serenity.
    • Gardening Tip: Thrives in dry, sunny spots—perfect for arid U.S. regions.

    6. Marigolds

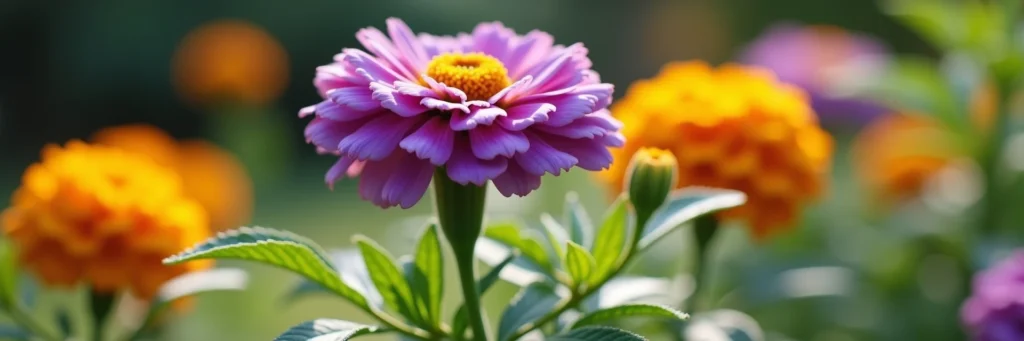
    • Specialty: Bold orange and yellow tones with a spicy scent.
    • Occasion: Day of the Dead, fall festivals, garden parties.
    • Symbolism: Remembrance, warmth, and creativity.
    • Gardening Tip: Plant near veggies to repel pests naturally.

    7. Peonies

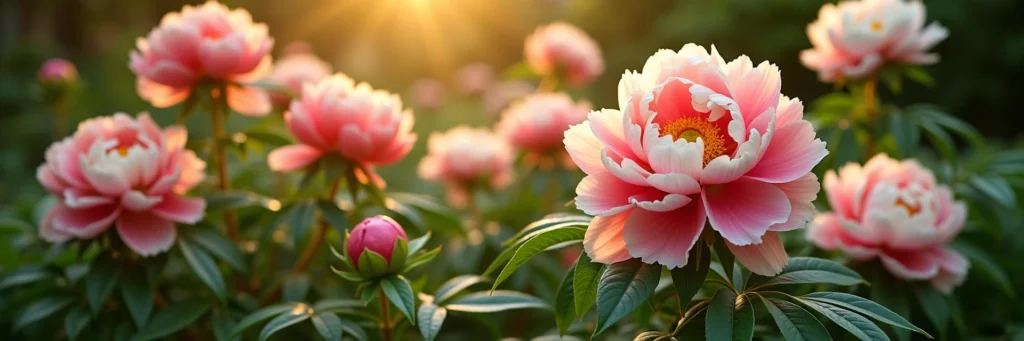
    • Specialty: Fluffy, oversized blooms that demand attention.
    • Occasion: Weddings, graduations, romantic gestures.
    • Symbolism: Prosperity, romance, and good fortune.
    • Gardening Tip: Stake tall stems to support heavy flowers.
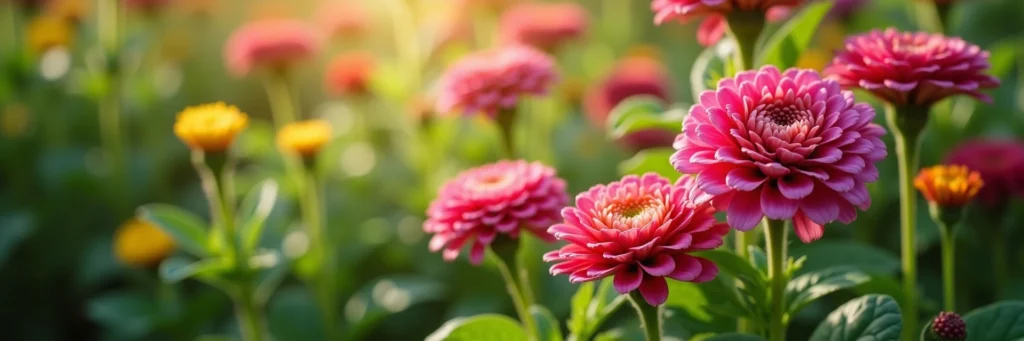
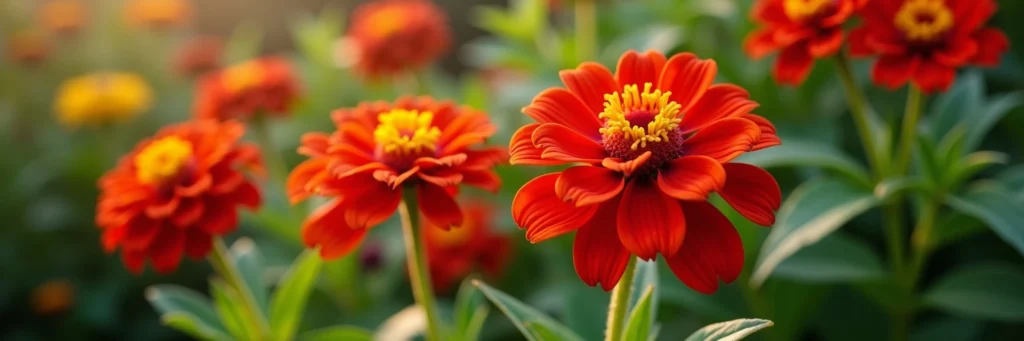
    8. Zinnias

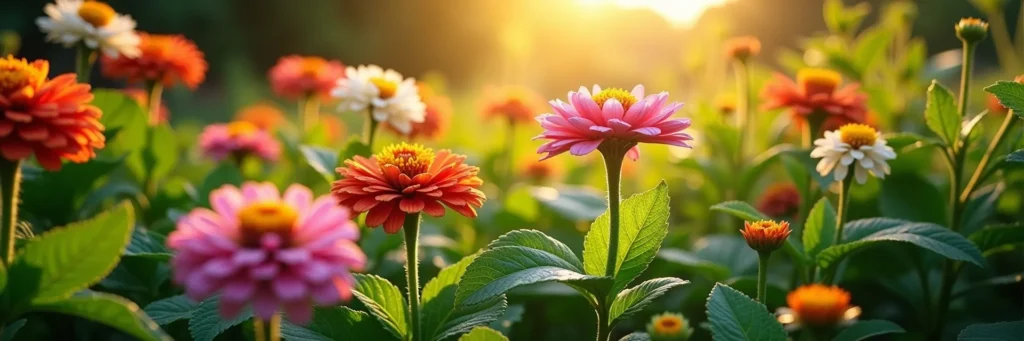
    • Specialty: Bright, heat-loving blooms in every color imaginable.
    • Occasion: Summer parties, friendship gifts, casual bouquets.
    • Symbolism: Lasting affection and fond memories.
    • Gardening Tip: Sow in warm soil for quick, vibrant growth.

    9. Hydrangeas

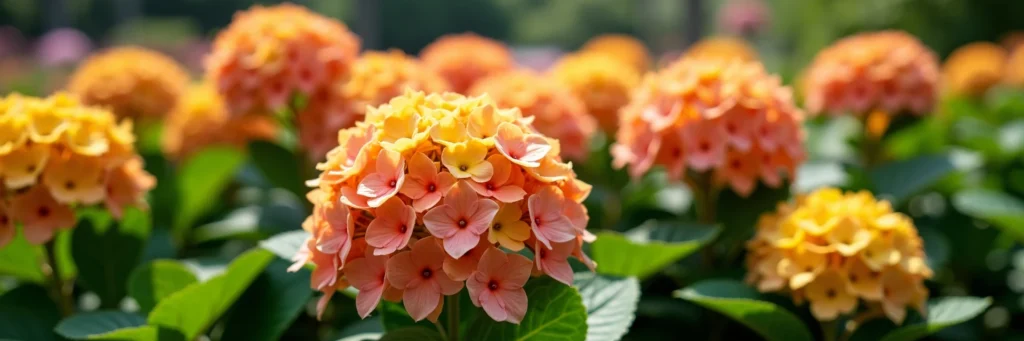
    • Specialty: Massive clusters that shift colors with soil pH.
    • Occasion: Bridal showers, sympathy arrangements, garden tours.
    • Symbolism: Gratitude (pink), heartfelt emotion (blue), or apology (white).
    • Gardening Tip: Adjust soil acidity for your desired hue.

    10. Daffodils

    Daffodils flower
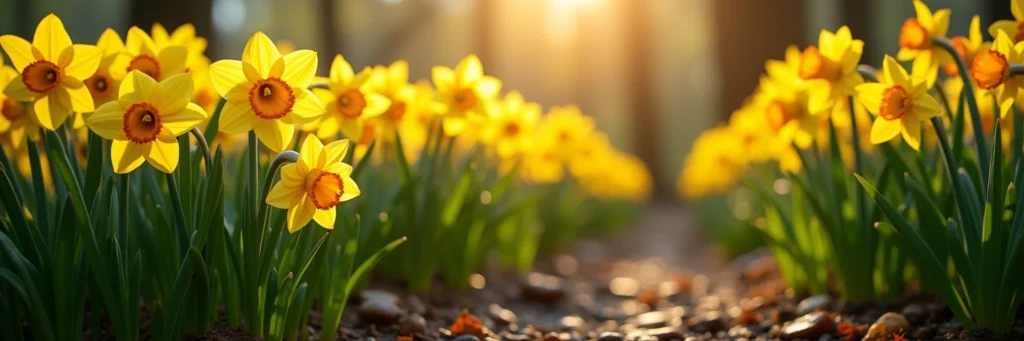
    • Specialty: Trumpet-shaped blooms that herald spring.
    • Occasion: Easter, new year celebrations, hope-themed events.
    • Symbolism: Renewal, hope, and resilience.
    • Gardening Tip: Plant in clusters for a natural, joyful display.
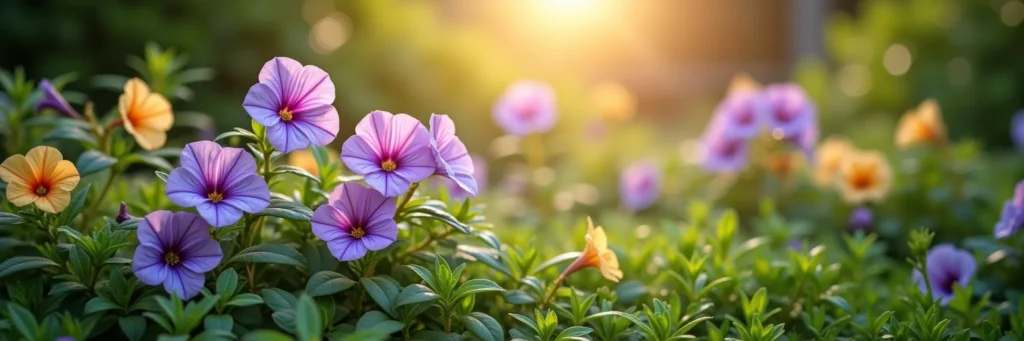
    11. Petunias

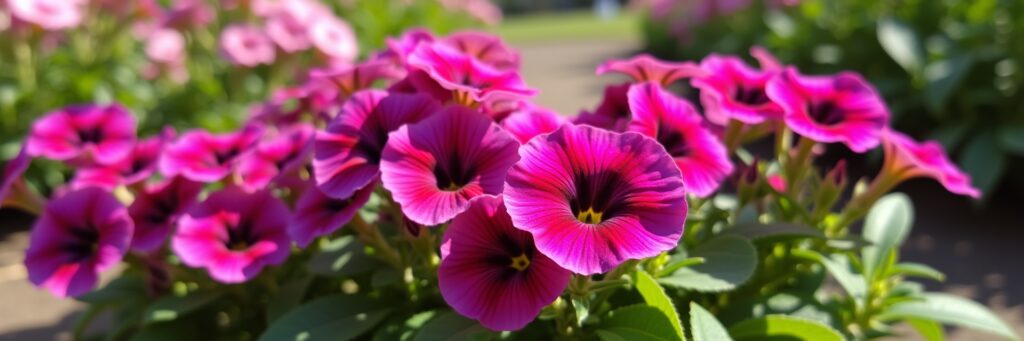
    Petunias spill over baskets and beds with vibrant, trumpet-shaped blooms, making them a summer staple across the U.S. Their trailing habit adds charm to patios from Florida to Oregon.

    • Occasion: Summer parties, housewarmings, casual gifts.
    • Symbolism: Comfort and peace—ideal for a cozy vibe.
    • Gardening Tip: Plant in full sun; pinch back for bushier growth.
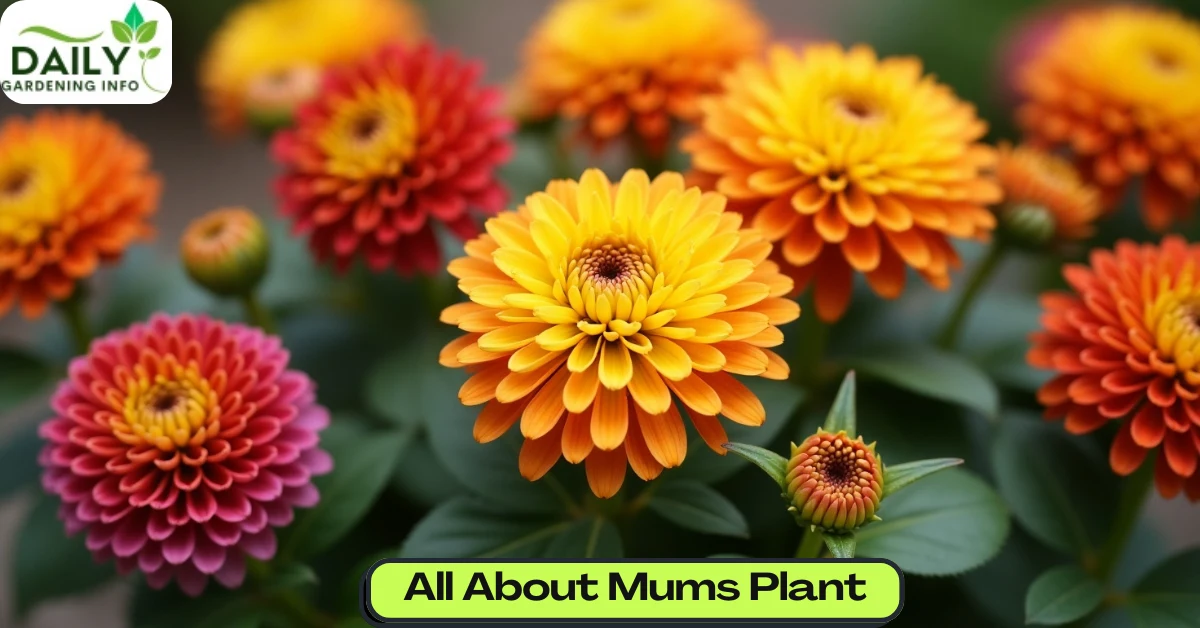
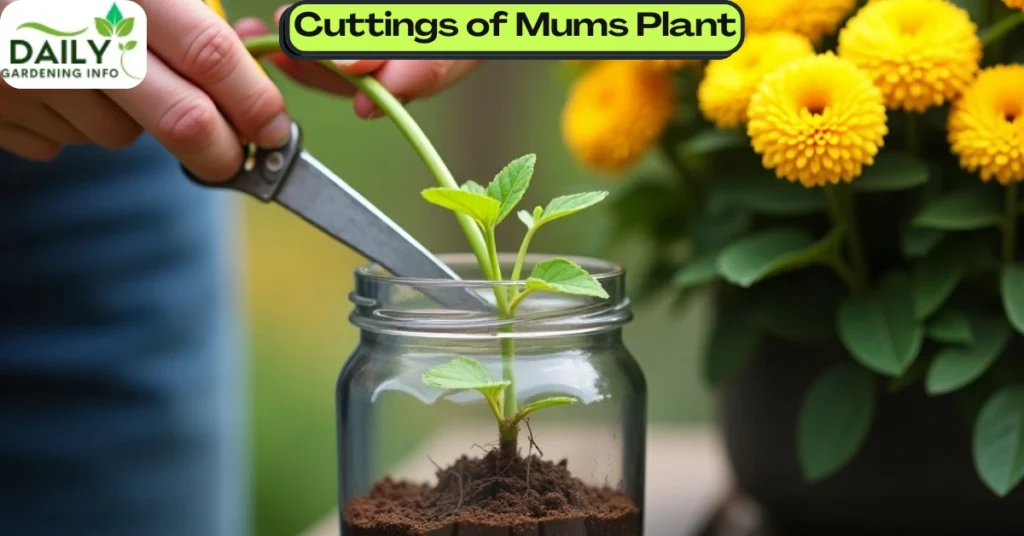
    12. Chrysanthemums

    Known as “mums,” chrysanthemums bring fall to life with their pom-pom blooms in gold, red, and white. They’re a gardener’s go-to for late-season color, thriving in crisp autumn air.

    • Occasion: Thanksgiving, fall festivals, memorials.
    • Symbolism: Joy and longevity.
    • Gardening Tip: Plant in spring for a stunning November show.

    13. Lilies

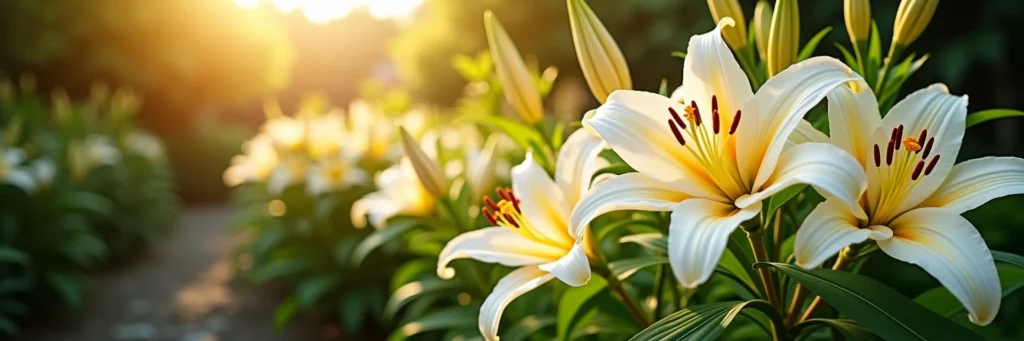
    Lilies are the divas of the flower world—tall, fragrant, and impossibly elegant. Whether Asiatic or Oriental, they’re a bold choice for any U.S. garden bed or vase.

    • Occasion: Weddings, funerals, milestone celebrations.
    • Symbolism: Purity and devotion.
    • Gardening Tip: Stake stems and plant in well-drained soil.

    14. Pansies

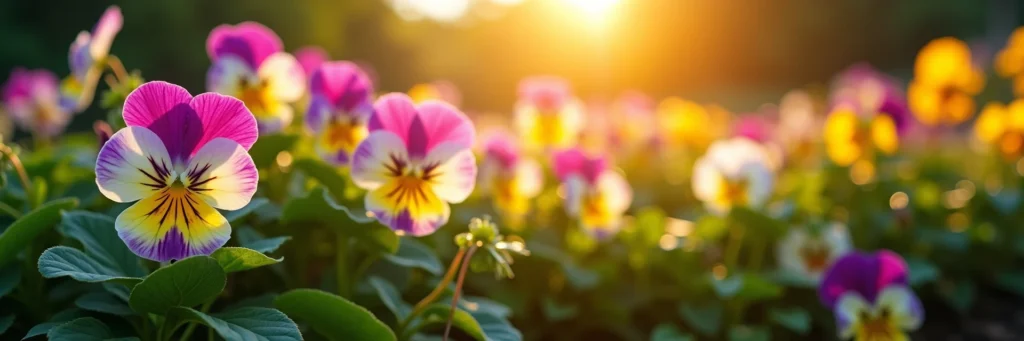
    Pansies wink at you with their cute, face-like petals, thriving in cooler weather. They’re perfect for adding early spring or late fall color to porches and plots.

    • Occasion: Spring teas, friendship gifts, seasonal decor.
    • Symbolism: Thoughtfulness and remembrance.
    • Gardening Tip: Plant in partial shade for longer blooms.

    15. Orchids

    Orchids are the royalty of indoor flowers, their delicate arches and exotic hues demanding attention. They’re a challenge worth taking for advanced U.S. growers.

    • Occasion: Anniversaries, promotions, luxury gifts.
    • Symbolism: Strength and refinement.
    • Gardening Tip: Mist regularly and keep in indirect light.

    16. Snapdragons

    Snapdragons stand tall with spiky blooms that kids love to “snap” open. Their whimsical shape adds height and fun to any flower garden.

    • Occasion: Children’s parties, summer weddings.
    • Symbolism: Gratitude and charm.
    • Gardening Tip: Sow in early spring for June flowers.

    17. Carnations

    Carnations are the unsung heroes of bouquets—long-lasting and available in every shade. They’re a budget-friendly beauty for U.S. florists and gardeners alike.

    • Occasion: Mother’s Day, sympathy arrangements.
    • Symbolism: Fascination (pink), love (red).
    • Gardening Tip: Deadhead to encourage more blooms.
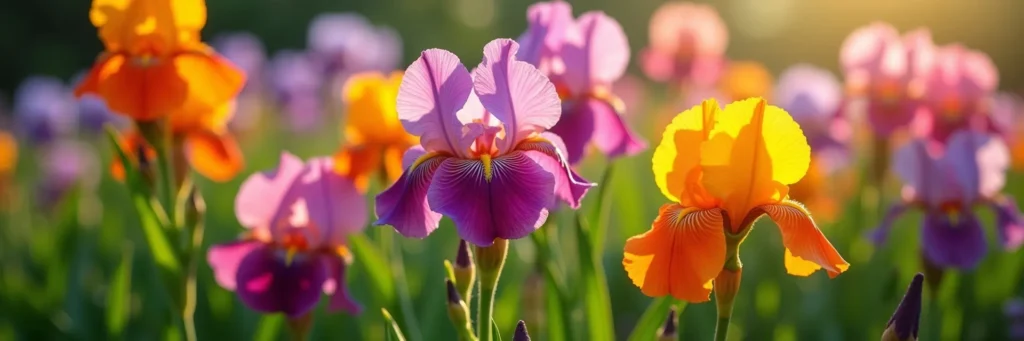
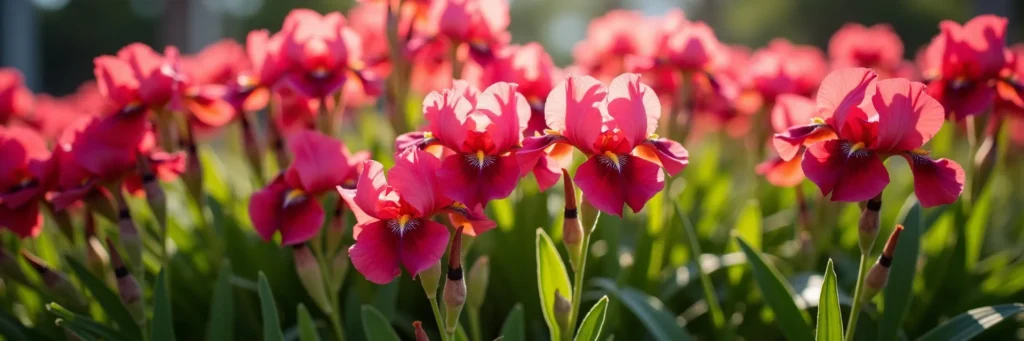
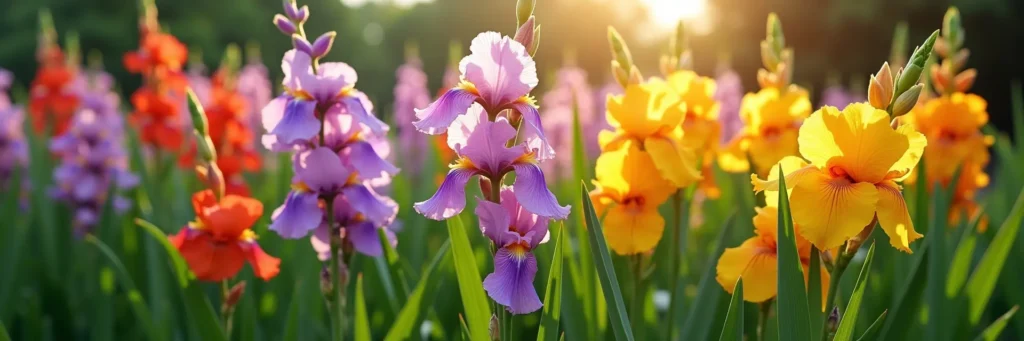
    18. Irises

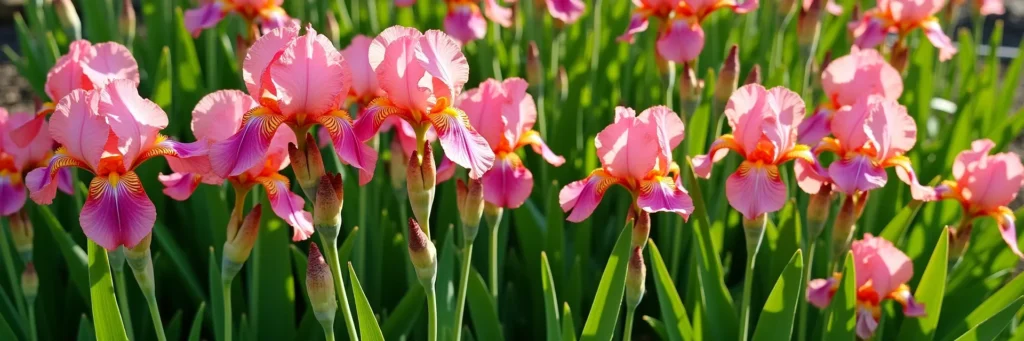
    Irises unfurl like flags in the breeze, their sword-like leaves framing vivid purple, blue, or yellow petals. They’re a classic in American cottage gardens.

    • Occasion: Graduations, artistic events.
    • Symbolism: Wisdom and hope.
    • Gardening Tip: Plant rhizomes shallowly in late summer.

    19. Gerbera Daisies

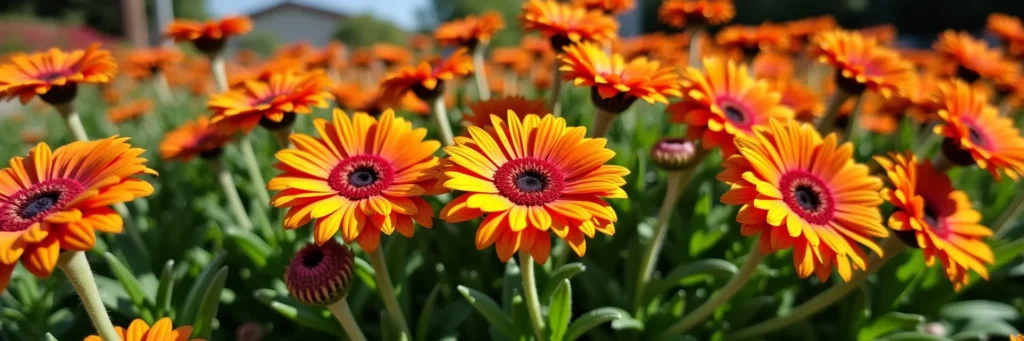
    Gerbera daisies pop with oversized, candy-colored blooms—think pink, orange, and red. They’re a cheerful addition to any sunny U.S. spot.

    • Occasion: Birthdays, get-well-soon gifts.
    • Symbolism: Cheerfulness and innocence.
    • Gardening Tip: Water at the base to avoid crown rot.

    20. Sweet Peas

    Sweet peas climb trellises with delicate, scented flowers, filling gardens with old-world charm. They’re a nostalgic pick for romantics.

    • Occasion: Vintage weddings, thank-you notes.
    • Symbolism: Blissful pleasure.
    • Gardening Tip: Soak seeds before planting in early spring.

    21. Cosmos

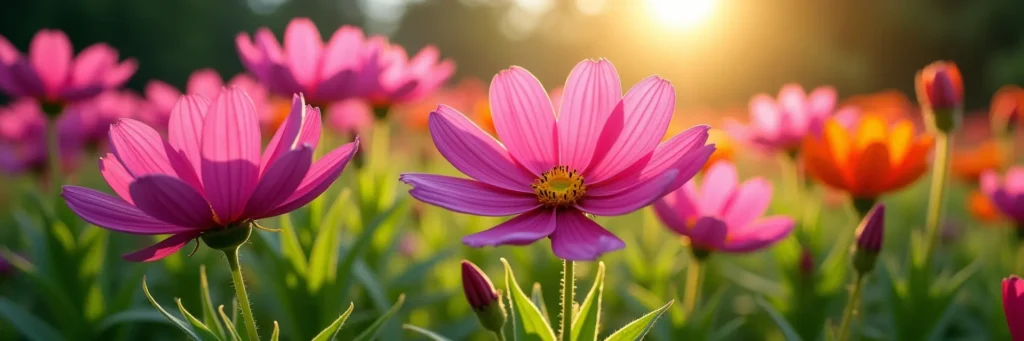
    Cosmos dance in the wind with feathery foliage and daisy-like blooms. They’re heat-tolerant and easy to grow, a win for busy U.S. gardeners.

    • Occasion: Casual gatherings, wildflower bouquets.
    • Symbolism: Harmony and order.
    • Gardening Tip: Sow directly in soil after the last frost.

    22. Begonias

    Begonias are a gardener’s dream with their waxy leaves and vibrant blooms in shades of pink, red, and white. Perfect for adding pops of color to shady corners of U.S. gardens, they’re as versatile as they come—think hanging baskets or border beds. Their lush foliage pairs beautifully with their flowers, making them a standout choice.

    • Occasion: Housewarmings, shaded patio decor, quiet celebrations.
    • Symbolism: Caution and gratitude—a nod to thoughtful connections.
    • Gardening Tip: Keep soil moist but not soggy; avoid direct sun for best results.

    23. Gladiolus

    Gladiolus shoots skyward with spiky blooms in fiery reds, soft pinks, and creamy whites. These tall beauties are summer showstoppers, adding drama to any backyard or bouquet across the USA.

    • Occasion: Summer weddings, congratulatory gifts, bold centerpieces.
    • Symbolism: Strength and integrity—perfect for honoring resilience.
    • Gardening Tip: Plant corms in spring, 4 inches deep, for a July-August bloom.

    24. Asters

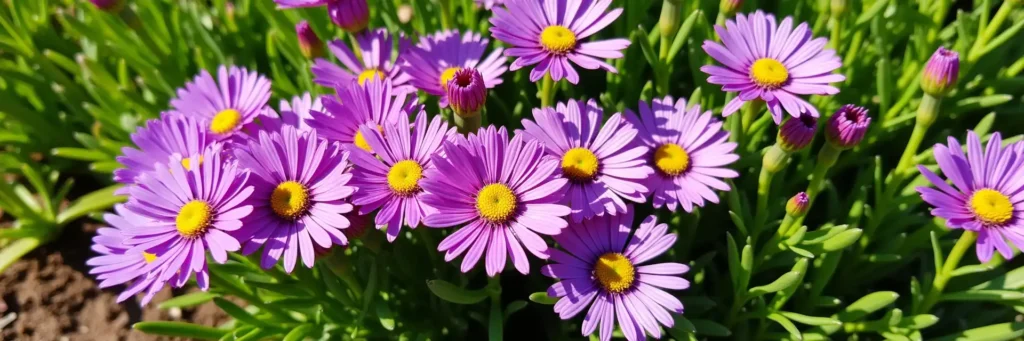
    Asters burst into star-shaped flowers late in the season, lighting up fall gardens with purple, blue, or pink hues. They’re a pollinator magnet—perfect for eco-conscious gardeners across the States.

    • Occasion: Autumn birthdays, harvest festivals, farewell gifts.
    • Symbolism: Patience and elegance.
    • Gardening Tip: Plant in full sun and pinch back in summer for bushier growth.

    25. Cornflowers

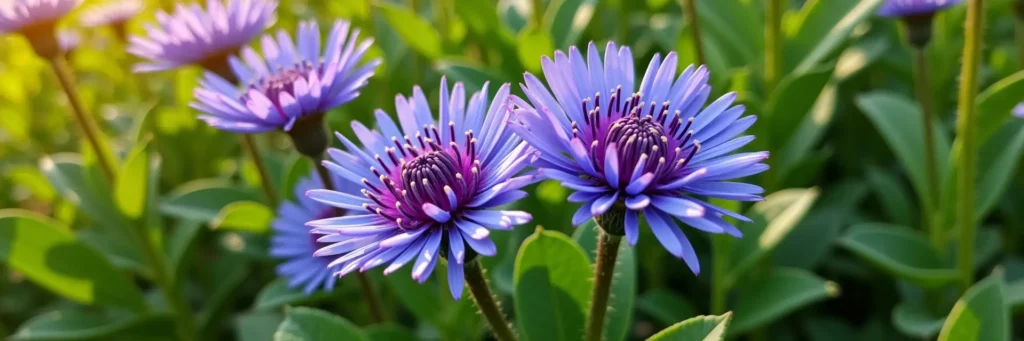
    Cornflowers charm with their vivid blue petals and rustic appeal, once a common sight in American grain fields. They’re tough, drought-resistant, and ideal for naturalized plots.

    • Occasion: Patriotic events (think Fourth of July), vintage bouquets.
    • Symbolism: Delicacy and hope.
    • Gardening Tip: Scatter seeds in early spring for a June bloom.

    26. Foxgloves

    Foxgloves flower

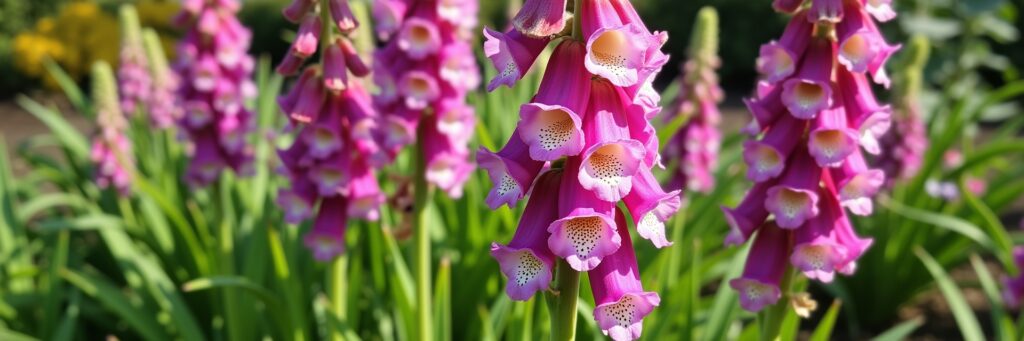
    Foxgloves rise like spires, their tubular blooms dangling in shades of pink, purple, and white. These biennials add drama to shady U.S. gardens but beware—they’re toxic, so keep them from pets and kids.

    • Occasion: Cottage garden tours, whimsical weddings.
    • Symbolism: Ambition and protection.
    • Gardening Tip: Plant in partial shade; they self-seed for years of beauty.

    27. Delphiniums

    Delphiniums flower

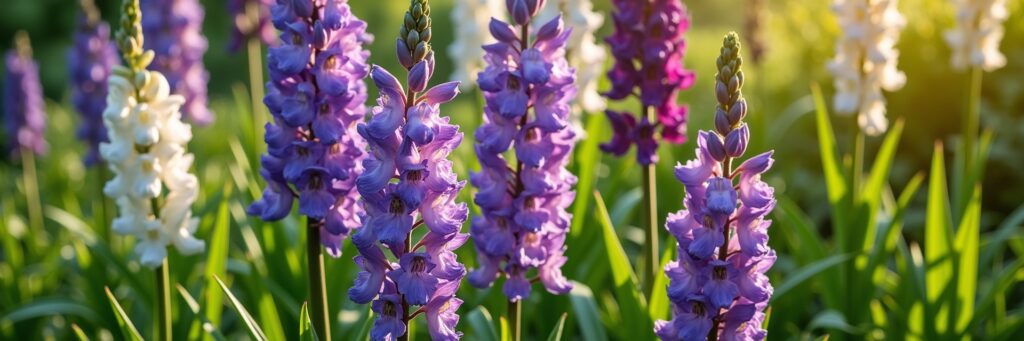
    Delphiniums tower with spikes of deep blue, lavender, or white flowers, making them a bold backdrop for any flower bed. They’re a favorite in cooler U.S. climates like the Pacific Northwest.

    • Occasion: Formal weddings, milestone celebrations.
    • Symbolism: Openness and dignity.
    • Gardening Tip: Stake early to support their height in windy areas.

    28. Anemones

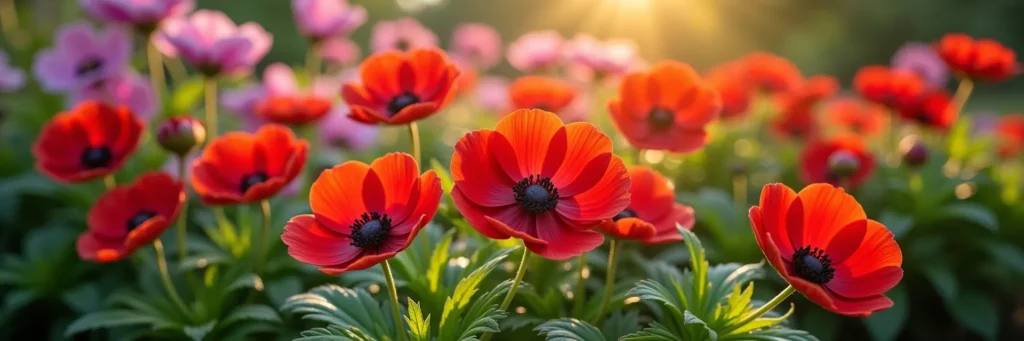
    Anemones unfold delicate, poppy-like blooms in jewel tones—red, purple, or white—often with a dark center. They’re early risers, perfect for bridging winter and spring in milder zones.

    • Occasion: Winter weddings, sympathy arrangements.
    • Symbolism: Anticipation and resilience.
    • Gardening Tip: Plant corms in fall in zones 7-10 for a February show.

    29. Bleeding Hearts

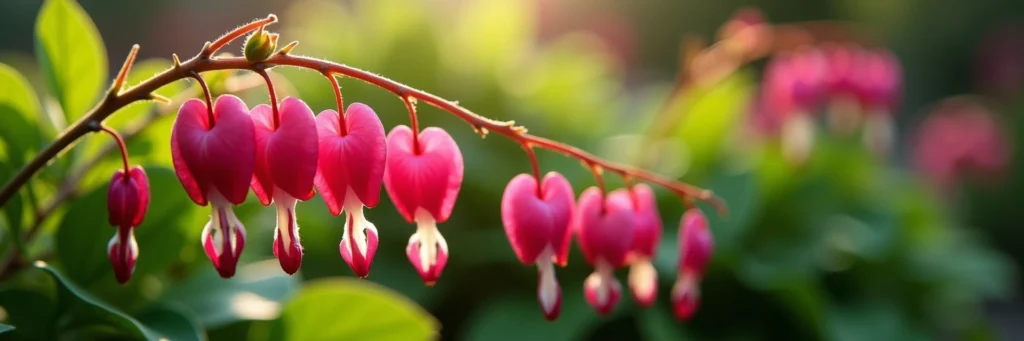
    Bleeding hearts dangle heart-shaped pink or white flowers from arching stems, thriving in shady spots. They’re a romantic pick for woodland-style U.S. gardens.

    • Occasion: Valentine’s Day, engagement gifts.
    • Symbolism: Unconditional love and compassion.
    • Gardening Tip: Keep soil moist; they go dormant in summer heat.

    30. Columbines

    Columbines flutter with bell-like flowers and spurred petals in red, yellow, or blue. These native wildflowers are hummingbird favorites, ideal for natural U.S. landscapes.

    • Occasion: Nature-themed events, friendship tokens.
    • Symbolism: Courage and peace.
    • Gardening Tip: Plant in partial shade; they reseed easily.

    31. Hellebores

    Hellebores, or Lenten roses, bloom in late winter with nodding, cup-shaped flowers in muted pink, green, or purple. They’re shade-lovers that defy cold snaps.

    • Occasion: Winter holidays, early spring teas.
    • Symbolism: Serenity and renewal.
    • Gardening Tip: Plant under trees for year-round interest.

    32. Yarrow

    Yarrow flower

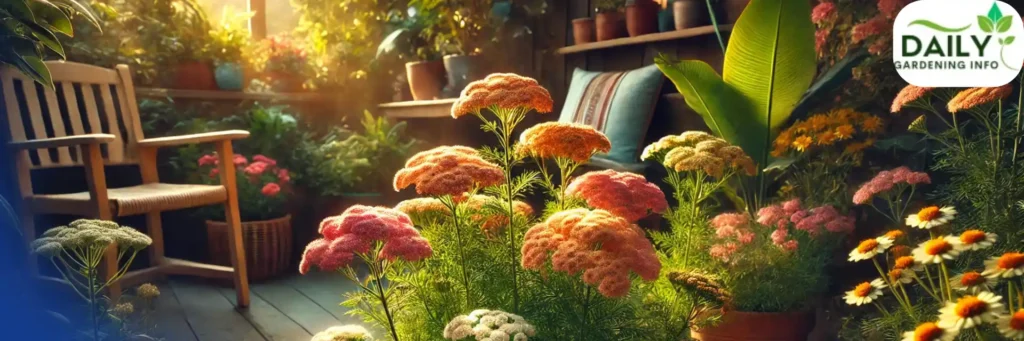
    Yarrow spreads flat clusters of tiny flowers in white, yellow, or pink, its ferny foliage adding texture. It’s a hardy perennial that thrives in tough U.S. conditions.

    • Occasion: Healing gifts, rustic weddings.
    • Symbolism: Health and endurance.
    • Gardening Tip: Cut back after blooming to encourage a second flush.
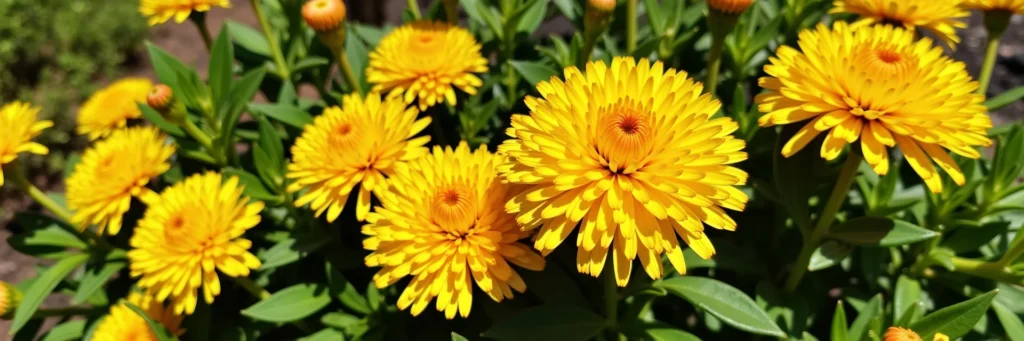
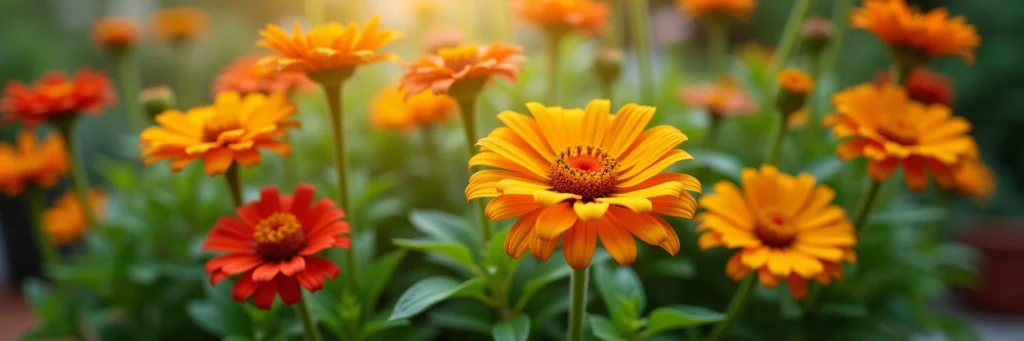
    33. Calendula

    Calendula flower

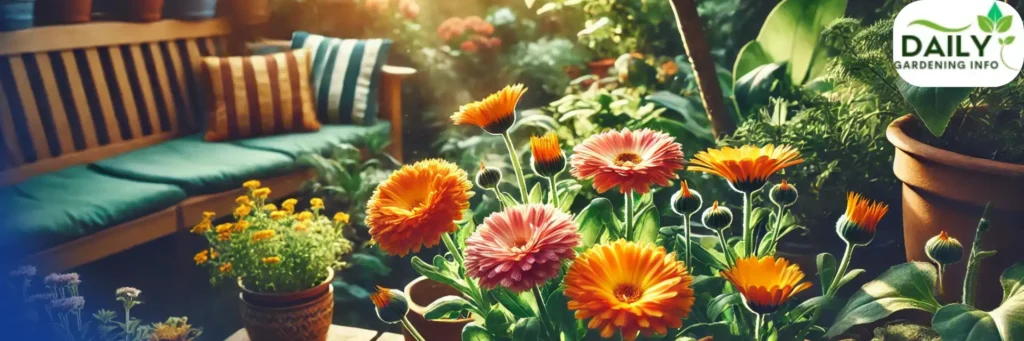
    Calendula glows with sunny orange or yellow petals, known for their skin-soothing properties. They’re edible too—perfect for adventurous gardeners!

    • Occasion: Kitchen garden parties, wellness events.
    • Symbolism: Joy and healing.
    • Gardening Tip: Sow in spring; they tolerate poor soil.
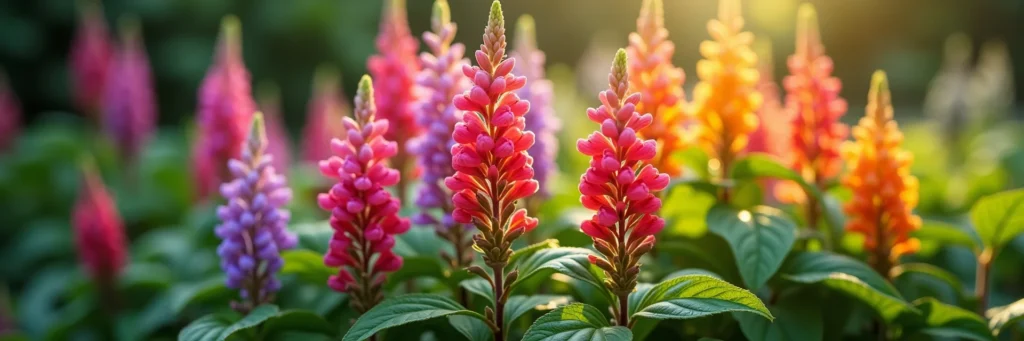
    34. Lupines

    lupines flower

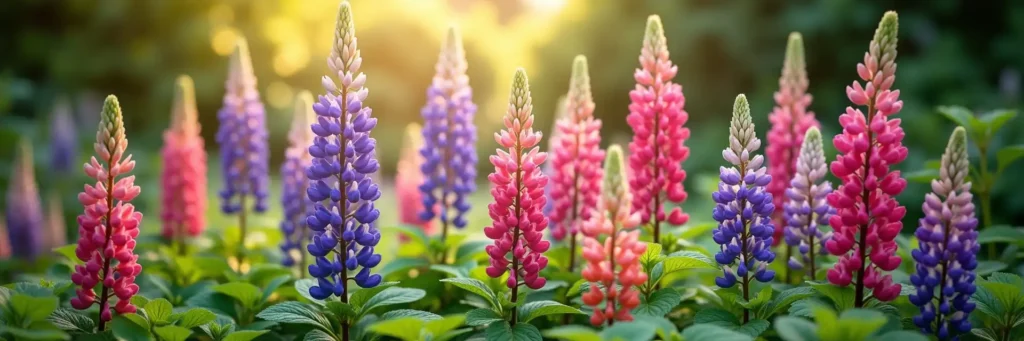
    Lupines rise like colorful towers, their spiky blooms in purple or pink painting gardens with bold strokes. These perennials thrive in cooler U.S. climates, adding a wild, imaginative flair to any landscape.

    • Occasion: Artistic events, spring festivals, creative gifts.
    • Symbolism: Imagination and inspiration.
    • Gardening Tip: Plant in acidic soil with good drainage for vibrant spikes.

    35. Stock

    Stock flowers

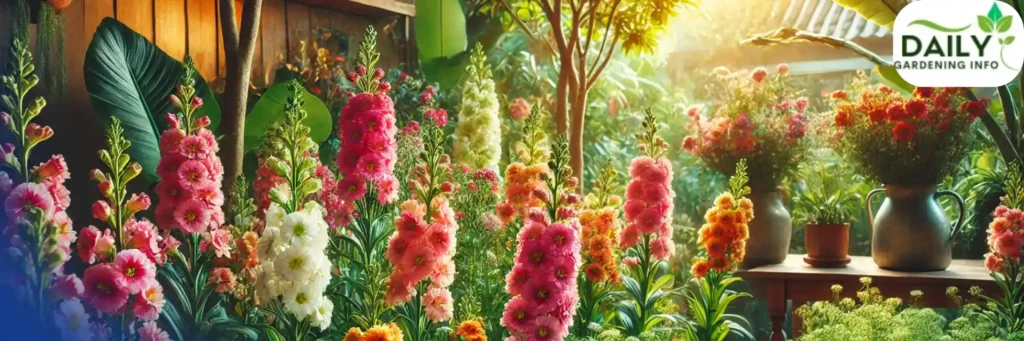
    Stock fills the air with a spicy-sweet fragrance, its springtime spikes blooming in soft pastels or rich jewel tones. Perfect for early-season U.S. gardens, it’s a timeless beauty that lasts.

    • Occasion: Spring weddings, Mother’s Day bouquets.
    • Symbolism: Lasting beauty and affection.
    • Gardening Tip: Grow in cool weather; plant in fall in mild zones.

    36. Nigella

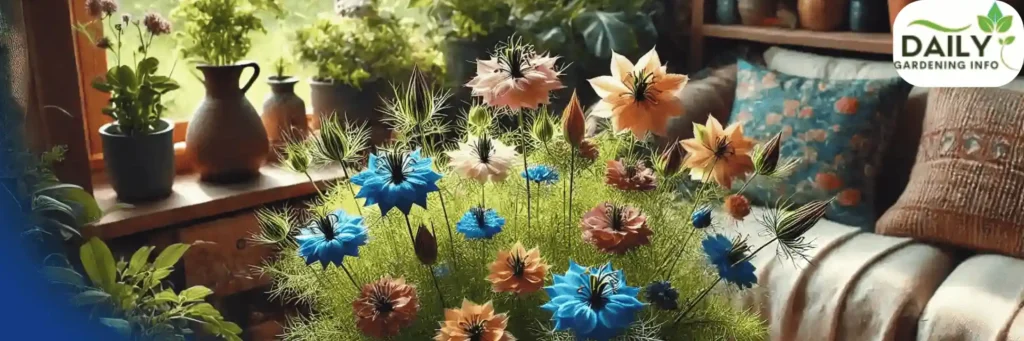
    Nigella, or love-in-a-mist, enchants with misty blue blooms nestled in feathery foliage. This self-seeding annual brings a dreamy touch to U.S. gardens and bouquets alike.

    • Occasion: Romantic gestures, whimsical weddings.
    • Symbolism: Love and mystery.
    • Gardening Tip: Scatter seeds in spring; it reseeds freely for years.

    37: Phlox

    Phlox flower

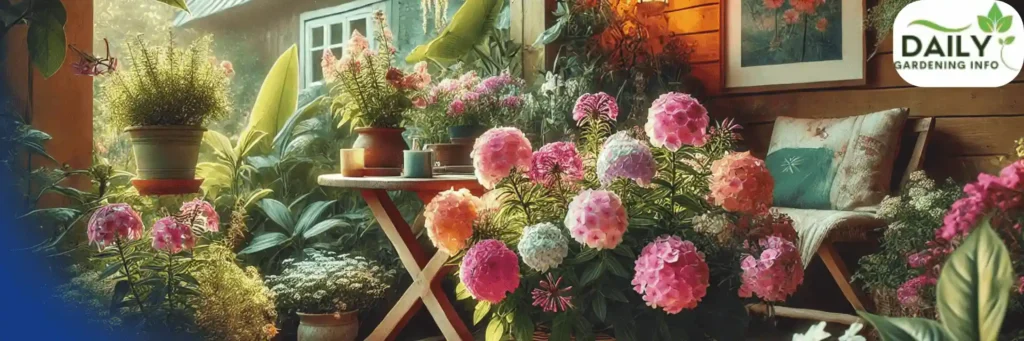
    Phlox bursts into starry clusters of pink, white, or purple, lighting up summer gardens across the USA. Its low-growing or tall varieties make it a versatile pick for borders or beds.

    • Occasion: Family reunions, unity celebrations.
    • Symbolism: Unity and harmony.
    • Gardening Tip: Deadhead spent blooms to keep the show going.

    38. Primroses

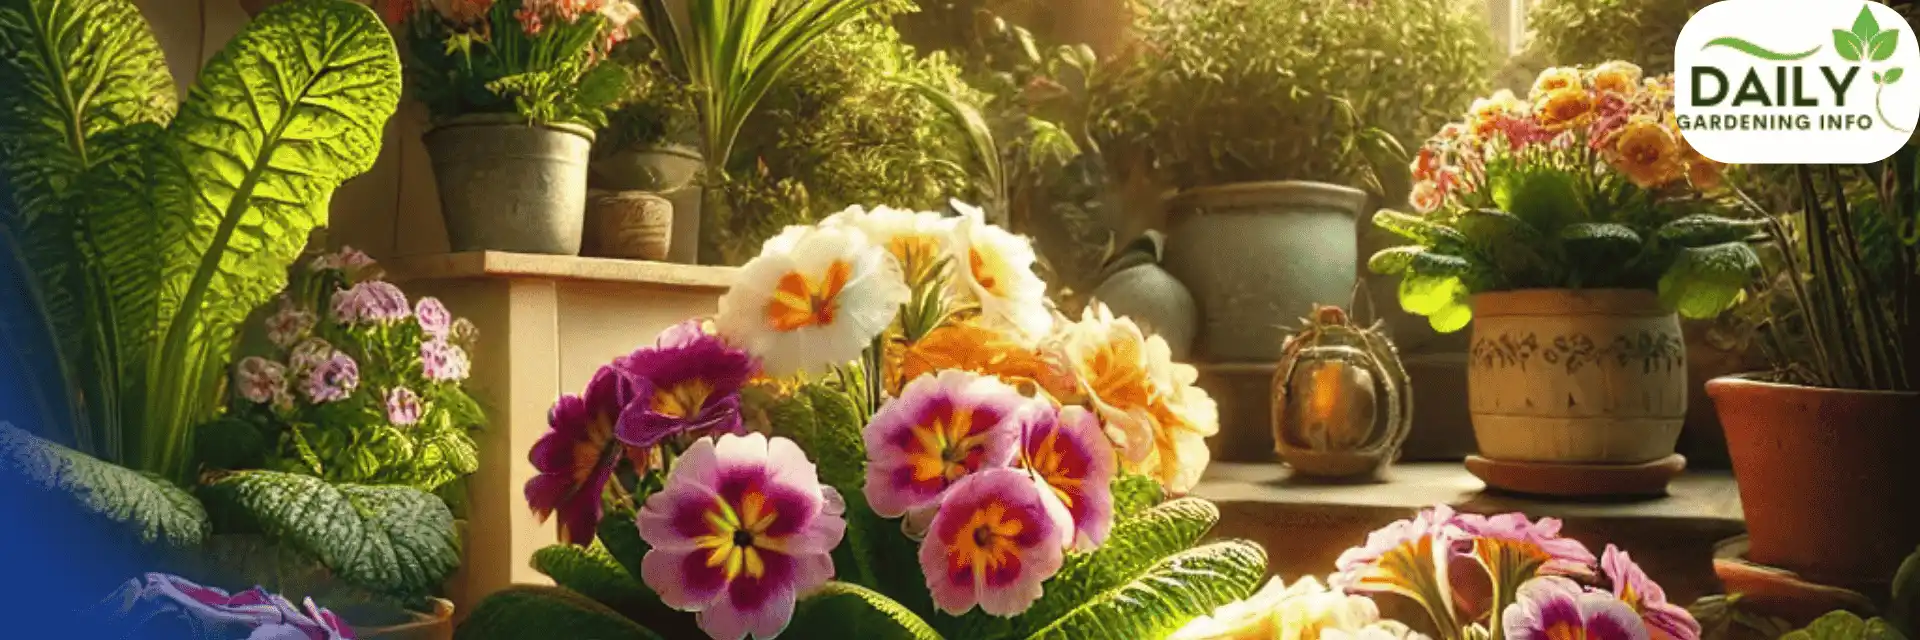
    Primroses greet early spring with pastel cups of yellow, pink, or blue, thriving in shady U.S. spots. These cheerful perennials are a promise of warmer days ahead.

    • Occasion: Baby showers, youth-themed events.
    • Symbolism: Youth and new beginnings.
    • Gardening Tip: Perfect for shady borders; keep soil moist.

    39. Salvias

    Salvias flower

    Salvias shoot up hummingbird-friendly spikes in red, blue, or purple, their drought tolerance making them a hit in dry U.S. regions like the Southwest. They’re as tough as they are pretty.

    • Occasion: Wildlife garden tours, virtue awards.
    • Symbolism: Virtue and wisdom.
    • Gardening Tip: Plant in full sun for maximum bloom power.

    40. Verbena

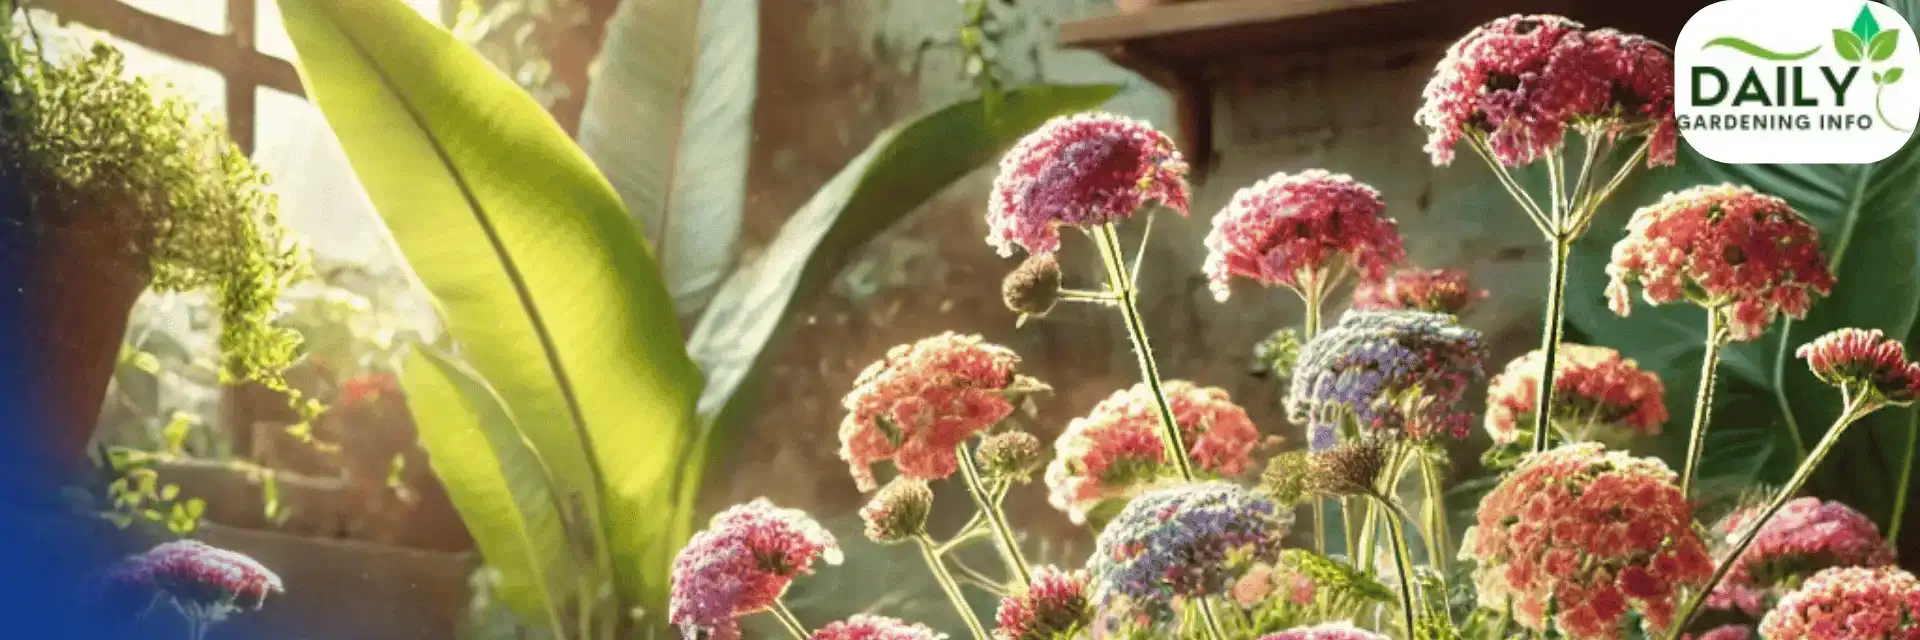
    Verbena sprinkles tiny flower clusters in vibrant hues, cascading beautifully in hanging baskets or spilling over edges. It’s an enchanting addition to any U.S. patio.

    • Occasion: Garden parties, charm-themed gifts.
    • Symbolism: Enchantment and creativity.
    • Gardening Tip: Pinch back for fuller growth in baskets.

    41. Alyssum

    Alyssum flower

    Alyssum carpets the ground with sweet-scented white or purple blooms, a low-maintenance gem for U.S. gardeners. Its honey-like fragrance draws bees and beauty alike.

    • Occasion: Ground cover displays, appreciation gifts.
    • Symbolism: Worth and sweetness.
    • Gardening Tip: Plant as edging; it thrives in sun or part shade.

    42. Campanula

    Campanula flower

    Campanula, or bellflowers, chime in with bell-shaped blooms in blue or white, dotting rock gardens or borders. They’re a graceful pick for rugged U.S. terrains.

    • Occasion: Thank-you bouquets, gratitude events.
    • Symbolism: Gratitude and constancy.
    • Gardening Tip: Thrives in well-drained rock gardens.
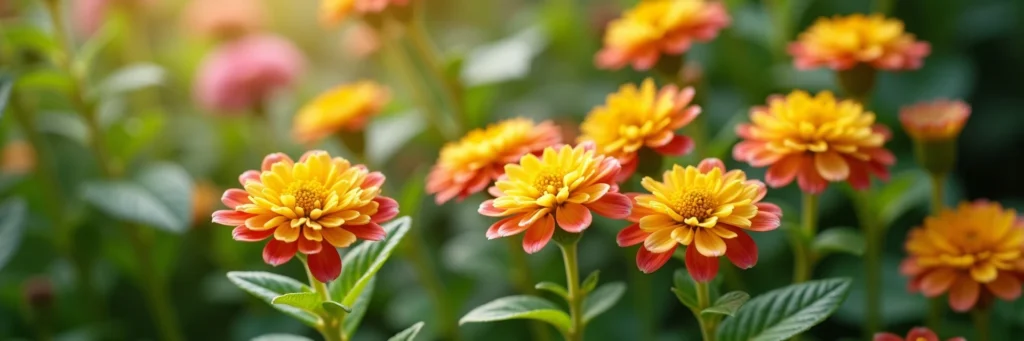
    43. Coreopsis

    Coreopsis flower

    Coreopsis shines with sunny, daisy-like flowers in yellow or pink, a heat-loving staple for easy U.S. gardens. Its long bloom time keeps summer smiling.

    • Occasion: Cheer-up gifts, summer barbecues.
    • Symbolism: Cheer and optimism.
    • Gardening Tip: Plant in full sun; it’s low-fuss and forgiving.

    44. Gaillardia

    Gaillardia flower

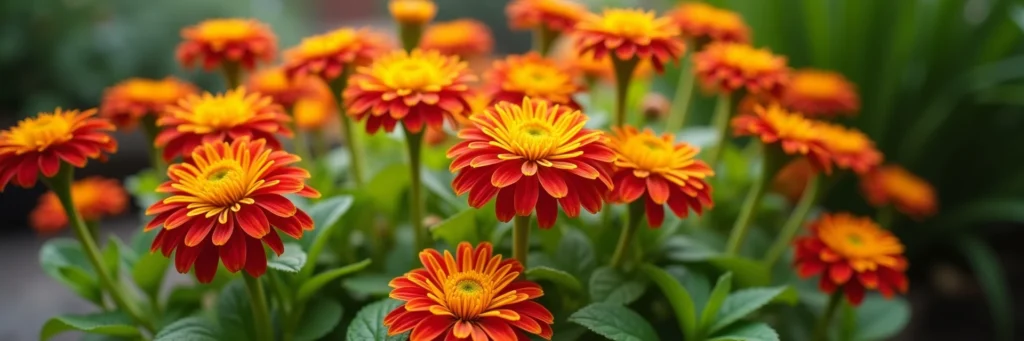
    Gaillardia, or blanket flowers, blanket the ground with bold red-and-yellow blooms, perfect for prairie-style U.S. gardens. They’re tough and dazzling all at once.

    • Occasion: Wildflower weddings, modesty tokens.
    • Symbolism: Modesty and resilience.
    • Gardening Tip: Ideal for dry, sunny spots like prairies.

    45. Hollyhocks

    Hollyhocks flower

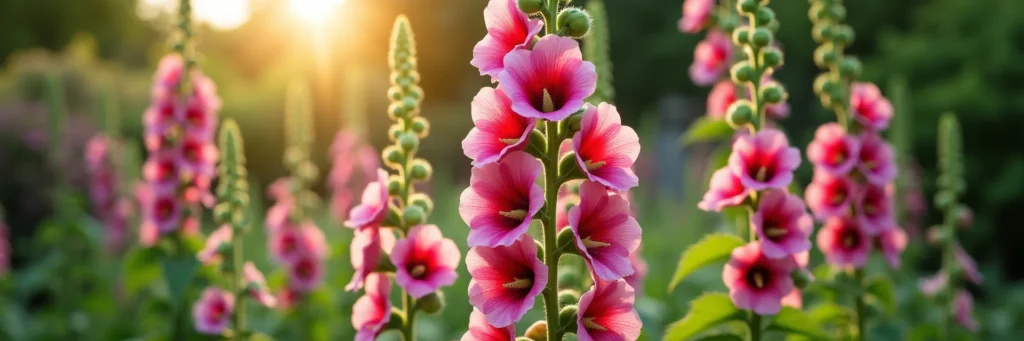
    Hollyhocks tower over cottage gardens with their tall spikes of pink, white, or red flowers, a nostalgic U.S. classic. They’re ambition in bloom form.

    • Occasion: Vintage garden tours, ambition awards.
    • Symbolism: Ambition and growth.
    • Gardening Tip: Plant against fences for support.

    46. Liatris

    Liatris flower

    Liatris spikes upward with feathery purple plumes, a butterfly magnet that adds joy to U.S. meadows and beds. It’s a native star with flair.

    • Occasion: Joyful celebrations, nature events.
    • Symbolism: Joy and energy.
    • Gardening Tip: Plant in sun to attract pollinators.

    47. Nasturtiums

    Nasturtiums Flower

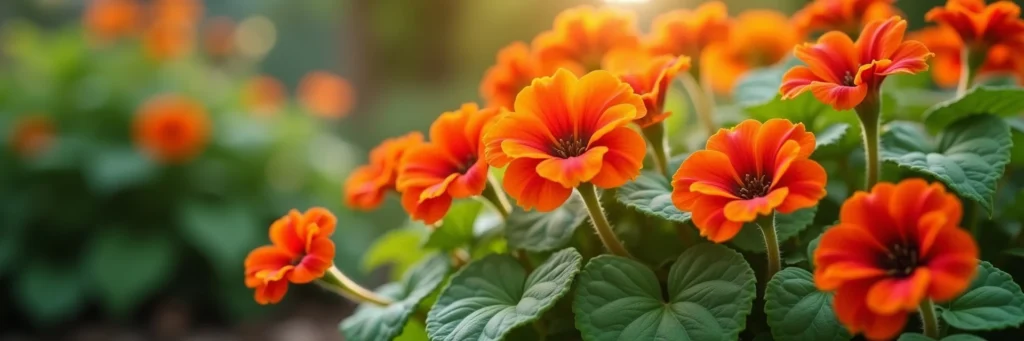
    Nasturtiums spill out edible rounds in orange, yellow, or red, their peppery leaves a bonus for U.S. foodie gardeners. They’re victory in vibrant form.

    • Occasion: Victory parties, edible arrangements.
    • Symbolism: Victory and conquest.
    • Gardening Tip: Grow in poor soil for more flowers.

    48. Scabiosa

    Scabiosa flower

    Scabiosa, or pincushion flowers, bloom in soft blues or pinks, their delicate heads lasting long in U.S. vases or gardens. They’re pure admiration.

    • Occasion: Admiration gifts, long-lasting bouquets.
    • Symbolism: Admiration and purity.
    • Gardening Tip: Cut often for extended bloom time.

    49. Tithonia

    Tithonia flower

    Tithonia, or Mexican sunflowers, blaze with orange-red giants, thriving in U.S. heat. They’re faith-filled towers for sunny yards.

    • Occasion: Faith-based events, summer displays.
    • Symbolism: Faith and warmth.
    • Gardening Tip: Give them space; they grow tall and wide.

    50. Agapanthus

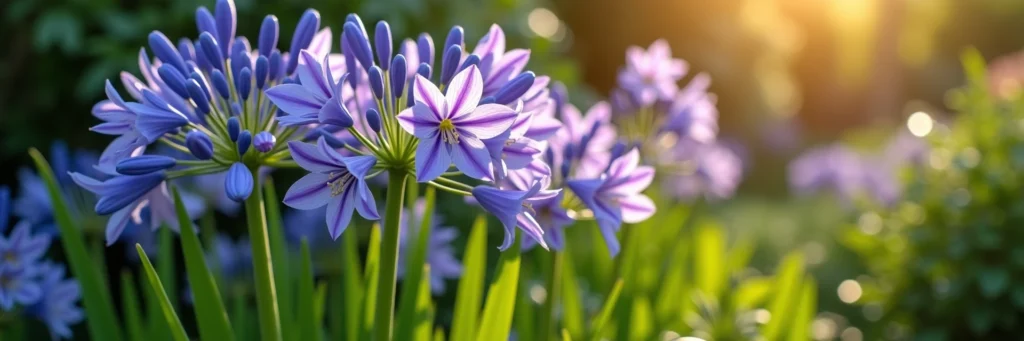
    Agapanthus crowns gardens with blue or white globes, a striking choice for pots in colder U.S. zones. They’re love in spherical form.

    • Occasion: Romantic gifts, patio showcases.
    • Symbolism: Love and beauty.
    • Gardening Tip: Grow in containers in zones 6 and below.

    51. Echinacea

    Echinacea flower

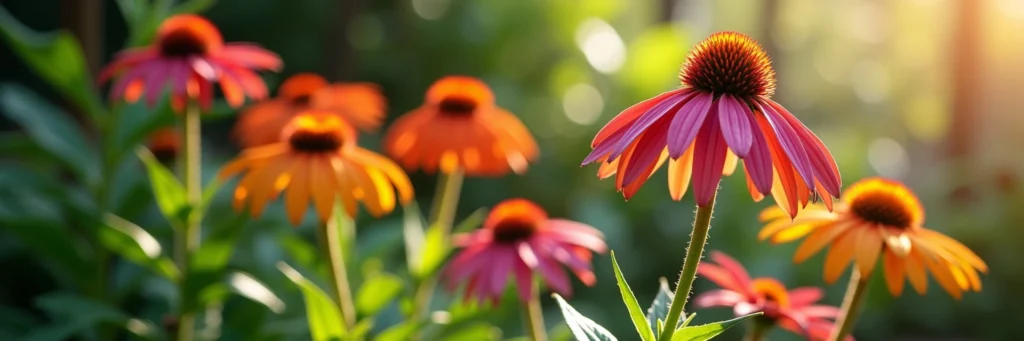
    Echinacea, or coneflowers, stand strong with pink or purple petals, a native U.S. healer and garden toughie. They’re all about strength.

    • Occasion: Healing wishes, native plant expos.
    • Symbolism: Strength and health.
    • Gardening Tip: Drought-tolerant; plant in full sun.

    52. Rudbeckia

    Rudbeckia flower

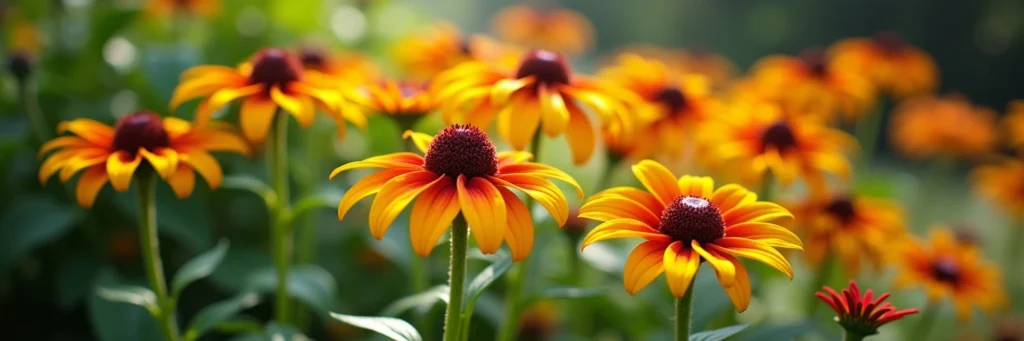
    Rudbeckia, or black-eyed Susans, glow with golden petals and dark centers, blooming all summer in U.S. gardens. They’re justice in flower form.

    • Occasion: Justice rallies, summer picnics.
    • Symbolism: Justice and encouragement.
    • Gardening Tip: Easy to grow; reseeds happily.

    53. Borage

    Borage twinkles with starry blue blooms, an edible treat that draws bees to U.S. gardens. It’s courage you can taste.

    • Occasion: Courage awards, bee-friendly events.
    • Symbolism: Courage and bliss.
    • Gardening Tip: Plant near veggies to boost pollination.

    Gardening Meets Meaning

    Growing these flowers in your U.S. garden isn’t just about beauty—it’s about planting purpose. Here’s how to nurture them:

    • Match Your Climate: Check your USDA zone—tulips love cooler zones (4-7), while zinnias thrive in heat (zones 9-11).
    • Soil Prep: Enrich with compost for nutrient-hungry peonies or hydrangeas.
    • Timing: Plant spring bloomers like daffodils in fall, summer stars like sunflowers in spring.

    My Favorite Picks

    If I had to choose, roses (for their romantic depth), sunflowers (for their bold joy), and lavender (for its calming vibe) top my list. They’re versatile, meaningful, and a delight to grow or gift. What’s your go-to flower for special moments?

    Conclusion: Let Flowers Tell Your Story

    With over 60 types of flowers, there’s a bloom for every occasion, emotion, and garden in the USA. Whether you’re celebrating love with roses, honoring memory with marigolds, or spreading cheer with daisies, these flowers bring meaning to life. Start growing or gifting them today—your story deserves a floral touch!

  • How to Care for Garden Tools: The Ultimate Guide

    How to Care for Garden Tools: The Ultimate Guide

    Gardening is a labor of love, but your tools need love too in form of attention. Knowing how to care for garden tools keeps them sharp, rust-free, and ready for action for every gardening purpose. Neglected tools can ruin your plants, slow your progress, and cost you money in replacements.

    In this comprehensive guide, we’ll cover everything from basic cleaning to advanced tips competitors often overlook—like disinfecting tools and eco-friendly maintenance—so you can master garden tool care and elevate your gardening game.

    Why Proper Garden Tool Maintenance Is Essential

    Your garden tools are not only an investment, but it is a time saver for you. Shovels, pruners, and hoes face dirt, moisture, and wear daily. Without proper garden tool maintenance, rust creeps in, blades dull, and handles crack. Caring for them not only extends their life but also ensures healthier plants free from spores and easier work. Let’s dive into how to care for garden tools with a step-by-step approach.

    Step-by-Step Guide to Caring for Garden Tools

    1. Clean Tools After Every Use

    Dirt and sap are silent destroyers of gardening equipment. After each session, rinse tools with a hose to remove soil. For stubborn mud, use a wire brush or putty knife. Sticky sap? Wipe blades with a cloth soaked in rubbing alcohol or warm soapy water. Cleaning is the foundation of how to care for garden tools and prevents long-term damage.

    2. Dry Thoroughly to Prevent Rust

    Moisture is rust’s best friend. After washing, dry your garden tools with a towel or let them air out in the sun. Store them in a dry shed or garage—never leave them outside overnight. This simple step is critical to garden tool maintenance and keeps metal gleaming.

    3. Sharpen Blades for Precision

    Dull tools tear plants instead of cutting cleanly, stressing your garden. Use a whetstone, file, or sharpening tool to hone edges on pruners, shears, and shovels. Aim for a 20- to 30-degree angle and test sharpness on paper or softwood. Regular sharpening is a must-know in how to care for garden tools.

    4. Oil Metal, and Wooden Parts

    Rust-proof your tools with a thin layer of machine oil, WD-40, or linseed oil on metal surfaces and hinges. For wooden handles, rub in linseed oil to prevent drying and cracking. Oiling keeps parts moving smoothly and is a pro tip in garden tool care that’s easy to implement.

    5. Store Tools Properly

    Don’t toss your garden tools in a pile. Hang them on a pegboard or rack to keep them off damp floors. Use silica gel packs in storage areas to absorb moisture. Proper storage is a cornerstone of how to care for garden tools, especially during off-seasons.

    6. Inspect and Repair Regularly

    Check for loose screws, cracked handles, or bent blades. Tighten bolts with a screwdriver, sand rough wooden handles, or replace broken parts. Catching issues early ensures your gardening tools stay reliable.

    Disinfecting Tools to Protect Plants

    One critical step competitors often skip is disinfecting garden tools. Dirty tools can spread plant diseases like blight or fungus between beds. After pruning diseased plants, soak blades in a 10% bleach solution (1 part bleach to 9 parts water) for 30 seconds, then rinse and dry. Alternatively, use isopropyl alcohol wipes. This overlooked aspect of how to care for garden tools safeguards your garden’s health.

    Guide to Caring for Garden Tools

    Caring for Specialized Garden Tools

    Not all gardening equipment is the same. Here’s how to handle unique tools:

    • Loppers and Hedge Shears: Disassemble hinges for deep cleaning and oiling.
    • Trowels: Scrape off clay-heavy soil with a plastic scraper to avoid scratching.
    • Garden Saws: Use a resin solvent to remove sap buildup on teeth.
    • Wheelbarrows: Lubricate wheels and check for rust on metal frames.

    Specialized care ensures every tool in your arsenal thrives, filling a gap in standard garden tool maintenance advice.

    Care for Gardening Tools

    Seasonal Maintenance for Year-Round Performance

    Adapt your garden tool care to the seasons:

    • Spring: Sharpen and oil tools to kick off the growing season.
    • Summer: Clean frequently due to daily use and humid weather.
    • Fall: Deep clean, oil, and store tools for winter dormancy.
    • Winter: Inspect for repairs indoors and sand wooden handles.

    Seasonal habits make how to care for garden tools second nature.

    Eco-Friendly Garden Tool Care Tips

    Sustainability matters. Competitors rarely mention green alternatives, but you can:

    • Clean with Vinegar: Swap harsh chemicals for white vinegar to remove rust.
    • Use Biodegradable Oils: Opt for plant-based lubricants over petroleum products.
    • Repurpose Old Tools: Turn broken handles into stakes or trellises.

    Eco-friendly garden tool maintenance benefits both your tools and the planet.

    Common Mistakes to Avoid

    1. Skipping Cleaning: Dirt invites rust and corrosion.
    2. Storing Wet Tools: Dampness ruins metal and wood.
    3. Ignoring Dull Blades: Blunt tools harm plants and strain your hands.
    4. Neglecting Disinfection: Disease spreads without proper sanitizing.

    Steer clear of these errors to excel at how to care for garden tools.

    Best Tools and Products for Garden Tool Care

    Stock up on these essentials:

    • Cleaning: Wire brush, putty knife, rubbing alcohol, vinegar.
    • Sharpening: Whetstone, diamond file, or sharpening stone.
    • Oiling: Linseed oil, WD-40, biodegradable lubricants.
    • Storage: Pegboard, tool rack, silica gel packs.
    • Disinfecting: Bleach solution, isopropyl alcohol wipes.

    These supplies streamline garden tool care and keep your kit pristine.

    How to Care for Garden Tools

    How Often Should You Maintain Garden Tools?

    • Daily: Clean and dry after use.
    • Monthly: Sharpen blades and oil moving parts.
    • Annually: Deep clean, inspect, and repair before storage.

    Consistency is key to mastering how to care for garden tools.

    Troubleshooting Common Tool Problems

    • Rust Spots: Scrub with steel wool and vinegar, then oil.
    • Sticky Hinges: Apply penetrating oil and work the joint loose.
    • Splintered Handles: Sand smooth and seal with linseed oil.
    • Bent Blades: Use a hammer and anvil to reshape (or replace if severe).

    Quick fixes keep your gardening tools functional.

    Starting fresh with your garden? Along with learning how to care for garden tools, don’t forget to check out how to start a garden in your backyard for a smooth gardening experience.

    Conclusion

    Mastering how to care for garden tools is about diligence and smart habits. Clean, dry, sharpen, oil, disinfect, and store your garden tools properly to enjoy years of reliable use. By addressing overlooked areas like disinfecting and eco-friendly care, you’ll outshine basic advice and keep your garden thriving. Start today—your tools will thank you with every dig and snip!

  • Explore Purple Tomatoes I Types, Growing Tips & Benefits

    Explore Purple Tomatoes I Types, Growing Tips & Benefits

    Purple tomatoes bring a fresh twist to the usual red ones. They stand out with bright colors, tasty flavors, and great health perks. This simple guide looks at different purple tomato varieties, shares easy tips for growing purple tomatoes, tackles common growing problems, suggests fun purple tomato recipes, and explains the health benefits of purple tomatoes. Plus, it shows how these tomatoes add beauty to your garden and goodness to your meals, giving you everything you need to enjoy them fully.

    Advantages of Cultivating Purple Tomatoes

    Purple tomatoes offer more than aesthetic appeal. They deliver substantial health benefits. The deep purple hue derives from anthocyanins, potent antioxidants that neutralize free radicals. These compounds reduce inflammation and protect cellular integrity. Additionally, purple tomatoes exhibit a distinctive smoky-sweet taste. Their cultivation is easy, rendering them an accessible option for gardeners seeking both novelty and nourishment.

    Notable Purple Tomato Varieties

    Cherokee Purple

    Cherokee Purple tomatoes constitute a revered heirloom cultivar. Originating over a century ago with the Cherokee tribe, they feature a reddish-purple exterior and a complex, sweet flavor. These tomatoes excel when sliced for sandwiches or incorporated into salads. Cultivation requires full sunlight—6 to 8 hours daily—and well-draining soil. Plants should be spaced 2 to 3 feet apart for optimal development.

    Indigo Rose

    Indigo Rose tomatoes are characterized by their nearly black skin. Rich in anthocyanins, they support cardiovascular health. These smaller fruits, weighing 2 to 3 ounces, offer a tangy-sweet taste and abundant Vitamin C. They enhance salads or serve as garnishes. Successful growth demands full sunlight and nutrient-rich soil.

    Purple-Black Heirloom and Hybrids

    Additional purple tomato varieties include Purple-Black Heirlooms and hybrids such as Black Krim. Each provides unique flavor profiles and sizes, suitable for sauces, salsas, or fresh consumption. Their vivid pigmentation reflects high nutrient content, making them valuable additions to any garden.

    Purple Bumble Bee

    Purple Bumble Bee tomatoes are diminutive, cherry-type fruits with purple and green striations. Their sweet, juicy nature suits snacking or garnishing. These adaptable plants thrive in containers or garden beds, provided they receive ample sunlight and proper drainage.

    Purple Bumble Bee tomatoes

    Optimal Conditions for Growing Purple Tomatoes

    Sunlight Requirements

    Purple tomatoes necessitate 6 to 8 hours of direct sunlight daily. This exposure ensures vigorous growth and abundant fruit production. A south-facing location is recommended. For indoor cultivation, supplementary grow lights are essential to maintain light levels.

    Watering Needs

    Consistent moisture is critical, with 1 to 2 inches of water required weekly. Irrigation should target the base to prevent foliar diseases. Mulching with organic materials, such as compost, preserves soil moisture and mitigates evaporation during warm periods.

    Soil Quality

    Purple tomatoes flourish in well-draining, fertile soil. Incorporation of compost or aged manure enhances nutrient availability. A soil pH of 6.0 to 6.8 is ideal for nutrient uptake. Regular soil testing prevents deficiencies that impair plant vigor.

    Temperature Preferences

    Daytime temperatures between 70°F and 85°F (21°C to 29°C) are optimal. Nighttime temperatures should exceed 55°F (13°C) to encourage flowering. Protection from excessive heat above 90°F (32°C) may involve shade cloth, while cooler climates benefit from greenhouse structures.

    Detailed Propagation of Purple Tomatoes in 10 Steps

    1. Select Propagation Method: Seeds are preferred for novice gardeners. Purple tomato seeds exhibit a germination rate of 70% to 90%, ensuring reliable results.
    2. Assemble Materials: High-quality heirloom seeds, such as Cherokee Purple or Brandywine, are recommended. A light seed-starting medium, trays, and a fine-mist sprayer are necessary tools.
    3. Prepare Containers: Fill trays with pre-moistened seed-starting medium. This ensures immediate seed-to-soil contact, facilitating germination.
    4. Sow Seeds: Plant seeds at a depth of ¼ inch. Place 2 to 3 seeds per cell and cover lightly with soil to avoid impeding emergence.
    5. Maintain Temperature: Position trays in an environment of 70°F to 80°F (21°C to 27°C). A heating mat may be employed to sustain warmth, accelerating germination.
    6. Provide Illumination: Upon sprouting, ensure 12 to 16 hours of light daily. Natural sunlight or artificial grow lights suffice. Insufficient light compromises seedling strength.
    7. Regulate Moisture: Apply a fine mist to maintain consistent soil moisture. Excess water risks root rot, while inadequate hydration delays growth.
    8. Thin Seedlings: When seedlings develop 2 to 3 true leaves, remove weaker specimens. Retain one robust plant per cell to eliminate competition.
    9. Enhance Nutrition: Administer a diluted organic fertilizer, such as compost tea, at the two-leaf stage. This supports early vigor without overwhelming young roots.
    10. Transplant Outdoors: Relocate seedlings measuring 6 to 8 inches after the final frost. Gradually acclimate them to outdoor conditions over 1 to 2 weeks, beginning with brief exposure.
    Propagation of Purple Tomatoes

    Practical Advice for Growing Purple Tomatoes

    Seed Selection and Germination

    Superior purple tomato seeds are foundational. Commence germination indoors 6 to 8 weeks prior to the last frost. Controlled warmth and ample light promote successful sprouting.

    Soil Preparation

    Soil must be nutrient-rich and well-draining. A pH range of 6.0 to 6.8 optimizes growth. Incorporate 2 to 3 inches of organic compost to enhance fertility and structure.

    Planting Techniques

    Transplant seedlings outdoors following the frost season. Allocate 24 to 36 inches between plants. Ensure 6 to 8 hours of sunlight daily. Water at the base to minimize disease risk.

    Structural Support

    Purple tomatoes benefit from staking or caging. Their vigorous growth requires support to prevent collapse. Pruning lateral shoots below the first flower directs energy to fruit production.

    Fertilization Schedule

    Apply a balanced fertilizer every 4 to 6 weeks during the growing season. Over-fertilization may favor foliage over fruit, necessitating moderation.

    Growing Purple Tomatoes

    Common Challenges and Resolutions

    Disease Prevention

    Purple tomatoes may succumb to blight or rot. Base watering and mulching reduce foliar moisture. These practices inhibit fungal proliferation effectively.

    Pest Management

    Aphids and caterpillars pose threats. Organic controls, such as neem oil, prove efficacious. Companion planting with marigolds or basil further deters infestations.

    Nutrient Deficiencies

    Blossom end rot signals calcium insufficiency. Soil amendments, such as gypsum, address this issue. Consistent irrigation prevents recurrence.

    Harvesting and Storing Purple Tomatoes

    Identifying Ripeness

    Harvest purple tomatoes when uniformly deep purple and slightly yielding to pressure. This ensures maximum flavor and quality.

    Harvesting Method

    Employ pruning shears to remove fruit. This technique preserves plant health and encourages continued production.

    Storage Guidelines

    Store purple tomatoes at room temperature, shielded from sunlight. Refrigeration diminishes flavor. For extended preservation, consider drying or canning.

    Culinary Applications of Purple Tomatoes

    Purple tomatoes enhance diverse dishes with their unique attributes:

    • Salad Enhancement: Slice purple tomatoes and combine with basil, mozzarella, and olive oil. A pinch of salt elevates the ensemble.
    • Salsa Preparation: Dice purple tomatoes with onions, peppers, and herbs. The smoky undertone enriches the mixture.
    • Sauce Creation: Roast purple tomatoes with garlic and rosemary. Puree for a refined pasta or pizza topping.
    • Grilled Option: Skewer cherry purple tomatoes alongside vegetables. Brief grilling intensifies their sweetness.

    Health Benefits of Purple Tomatoes

    Purple tomatoes are replete with vitamins A, C, and K, supporting vision, immunity, and skeletal health. Potassium and fiber contribute to cardiovascular wellness. Anthocyanins provide anti-inflammatory and antioxidant effects, potentially mitigating chronic disease risks, including cancer and heart conditions.

    Conclusion: The Value of Purple Tomatoes

    Purple tomatoes elevate gardens with elegance and nutrition. Cherokee Purple, Indigo Rose, and other purple tomato varieties offer the exceptional flavor and health benefits of purple tomatoes. Their cultivation is both accessible and rewarding. Integrating purple tomatoes into horticultural and culinary practices yields substantial returns in beauty and vitality.

  • All About Mums Plant: Chrysanthemums Growing & Caring

    All About Mums Plant: Chrysanthemums Growing & Caring

    The Mum plant, scientifically known as Chrysanthemum, is a beloved garden flower admired for its vibrant blooms and versatility. Whether you’re a seasoned gardener or a beginner, exploring all about Mums plant can equip you with the knowledge to cultivate these stunning flowers successfully. Available in a spectrum of colors—such as yellow, crimson, purple, and white—mums bring a burst of beauty to gardens, patios, and even indoor spaces.

    These hardy perennials thrive in cooler fall months, making them a popular choice for seasonal displays. This guide covers everything you need to know all about Mums plant, from their characteristics and varieties to planting tips, care routines, and creative decorating ideas.

    What Are Mum Plants?

    Mums, or chrysanthemums, are flowering perennials cherished for their resilience and eye-catching blooms. Native to Asia and parts of Europe, they have been cultivated for centuries and hold cultural significance in many regions. Mums are easy to grow, adaptable to various conditions, and perfect for adding long-lasting color to outdoor and indoor spaces. With proper care, these plants can bloom year after year, making them a staple in gardens and container displays.

    Key Characteristics of Mum Plants

    Mums come in diverse flower forms, including daisy-like, pom-pom, and spider-shaped blooms. They typically grow between 1 and 3 feet tall, with green leaves that range from broad to narrow. Their adaptability to different climates and soil types makes them suitable for gardeners of all skill levels. Whether planted in garden beds or pots, mums are a low-maintenance option for enhancing your landscape.

    Popular Chrysanthemum Varieties

    Selecting the right Mum plant variety can elevate your garden’s aesthetic. Here are some standout options to consider:

    • ‘Sheffield Pink’: Known for its soft pink flowers, this variety blooms from late summer to fall and thrives in full sun.
    • ‘George G. W. Bush’: Features bright yellow blooms, perfect for sunny spots and adding cheerful color.
    • ‘Dark Bronze’: Offers rich bronze petals and excellent drought resistance once established.
    • ‘Mum’s the Word’: Boasts unique, colorful blooms that attract pollinators like bees and butterflies.

    Each variety brings its own charm, so choose based on your climate, garden style, and color preferences.

    How to Care for Mum Plants

    Proper care ensures your Mum plants thrive and produce abundant blooms. Here’s a detailed breakdown of their maintenance needs:

    Watering Mum Plants

    Mums require consistent moisture, especially during dry spells. In fall, reduce watering to once every few days, focusing on deep irrigation to strengthen roots for winter. Avoid overwatering, as soggy soil can lead to root rot.

    Fertilizing for Healthy Growth

    Apply a low-nitrogen, high-phosphorus fertilizer (e.g., 5-10-10) in early fall to encourage blooming. Organic options like compost or well-rotted manure also enrich the soil, promoting robust plants.

    Protecting Mums from Frost

    Shield your mums from frost by covering them with a frost cloth or lightweight fabric during cold snaps. This extends their blooming period and protects delicate foliage.

    Mulching for Insulation

    Before the first frost, add a 2-3 inch layer of organic mulch—such as straw, shredded bark, or leaves—around the base. Mulch retains moisture, regulates soil temperature, and safeguards roots from freezing.

    Pruning for Longevity

    After frost, trim dead stems to 3-4 inches above the ground. This prevents disease and encourages vigorous spring growth.

    Propagating Mum Plants: Step-by-Step

    Propagating mums is a cost-effective way to expand your collection. You can use division or cuttings—both methods are straightforward with the right approach.

    Cuttings

    In early summer, snip a 4-6 inch section from a healthy stem, just below a leaf node. Remove lower leaves, dip the cut end in rooting hormone (optional), and plant in moist soil. Roots typically develop within a few weeks.

    Division

    In spring or fall, dig up mature Mum plants and separate them into smaller clumps, ensuring each section has healthy roots. Replant immediately in well-draining soil.

    Propagation Tips

    • Provide bright, indirect sunlight.
    • Maintain a temperature of around 70°F (21°C).
    • Be patient—successful rooting takes time but yields rewarding results.

    Planting Mum Plants: A Detailed Guide

    Timing and technique are critical for establishing healthy Mum plants. Follow these steps for optimal results.

    When to Plant Mums

    The best time to plant mums is in spring, after the last frost. This allows roots to establish before summer heat and ensures vibrant fall blooms. Fall planting is possible but less ideal, as plants may struggle to root before winter.

    How to Plant Mums

    1. Select a Sunny Location: Mums need at least 6 hours of direct sunlight daily. Avoid shady spots, which can weaken plants and reduce blooms.
    2. Prepare Well-Draining Soil: Test soil pH (ideal range: 6.0-7.0) and amend with compost if needed. Raised beds work well for poor-draining areas.
    3. Dig the Hole: Make it twice as wide as the root ball and the same depth. Space plants 18-24 inches apart for airflow.
    4. Position the Plant: Set the crown level with the soil surface to prevent rot.
    5. Backfill and Water: Fill the hole with soil, press gently, and water thoroughly to settle the roots.
    6. Add Mulch: Apply mulch to conserve moisture and suppress weeds.

    Keeping Mum Plants Blooming

    To maximize bloom time, follow these tips:

    • Deadhead Regularly: Remove faded flowers to redirect energy into new blooms.
    • Fertilize Sparingly: Use a balanced 10-10-10 fertilizer every 4-6 weeks during the growing season, avoiding excess nitrogen.

    Growing Mum Plants in Containers

    Mum plants adapt beautifully to containers, making them ideal for patios or small spaces. Use pots 12-18 inches wide with drainage holes, filled with a mix of potting soil and perlite. Place them in a sunny spot and water consistently.

    Decorating with Mum Plants

    Mums are versatile for home and garden decor. Try these ideas:

    • Potted Displays: Arrange colorful mums on porches or entryways.
    • Window Boxes: Combine mums with trailing plants for a vibrant look.
    • Centerpieces: Use low pots of mums for elegant table settings.

    Common Problems and Solutions

    Mum plants are hardy but can face challenges. Here’s how to address them:

    Powdery Mildew

    • Symptoms: White coating on leaves.
    • Solution: Improve airflow, water at the base, and apply a fungicide if needed.

    Pests (Aphids, Spider Mites etc)

    • Solution: Inspect regularly, use insecticidal soap, or introduce beneficial insects like ladybugs.

    Weed Control

    Hand-pull weeds or use landscape fabric to keep beds tidy.

    Indoor Gardening with Mum Plants

    For indoor mums, ensure 6+ hours of sunlight (or use grow lights), maintain 65-70°F, and keep humidity moderate with a tray of water nearby.

    Benefits of Mum Plants

    Beyond their beauty, Mum plants improve air quality by filtering toxins and support pollinators like bees, enhancing biodiversity. Gardening with mums also reduces stress, offering a therapeutic connection to nature.

    Conclusion

    All about Mum plants reveals their value as resilient, beautiful additions to any space. With the right care—proper planting, watering, and maintenance—they thrive through seasons, delivering vibrant color and environmental benefits. Whether in gardens, pots, or indoors, chrysanthemums are a rewarding choice for enhancing your surroundings and supporting a healthier ecosystem.

  • How to Get Rid of Moss: A Comprehensive Guide

    How to Get Rid of Moss: A Comprehensive Guide

    Introduction

    Moss growth in your lawn or garden can detract from its appearance and health, often overtaking grass or encroaching on vegetable beds. This persistent plant can indicate underlying issues that require attention. If you seek effective strategies for how to get rid of moss, this guide provides a thorough examination of its nature, causes, and removal techniques. By following these steps, you can restore your outdoor space to a pristine, thriving condition.

    Defining Moss: Understanding the Plant

    Moss is a small, non-flowering plant that forms dense, green mats in moist, shaded environments. Lacking true roots, it absorbs water and nutrients directly through its leaves, enabling rapid spread via spores. While moss may appear decorative in moderation, excessive growth often signals problems such as poor soil conditions or insufficient sunlight. Understanding its characteristics is essential for effective control.

    Investigating Moss Growth: What Drives Its Spread?

    Analyzing the Causes of Moss Proliferation

    To successfully address how to get rid of moss, it is critical to identify the factors promoting its growth. Below are the primary reasons moss establishes itself in lawns and gardens:

    • Inadequate Drainage: Soil that retains excessive moisture fosters moss development. Areas with clay-rich soil, compaction, or low elevation are particularly susceptible, with studies suggesting a 50% increase in moss prevalence under such conditions. Overwatering or heavy foot traffic exacerbates this issue by preventing proper water dispersal.
    • Excessive Shade: Moss requires minimal sunlight—approximately 2-3 hours daily—while grass and most garden plants need 4-6 hours to thrive. Dense tree canopies, tall structures, or untrimmed shrubs create shaded zones where moss outcompetes other vegetation. Accumulated debris, such as fallen leaves, further enhances these conditions.
    • Acidic Soil Conditions: Moss prefers soil with a pH below 6.0, a level at which grass struggles and many vegetables underperform. This acidity often results from organic decay (e.g., pine needles or leaf litter) or acidic runoff. Grass typically requires a neutral pH of 6.5-7.0, while vegetables such as tomatoes favor 6.0-6.8.
    • Soil Compaction: Dense, compacted soil restricts air, water, and nutrient flow to plant roots, weakening grass or crops and allowing moss to dominate. This is common in high-traffic areas or neglected garden sections.
    • Limited Air Circulation: Enclosed spaces with poor airflow—caused by dense plantings, fences, or buildings—retain moisture, creating an ideal habitat for moss. This can also encourage fungal growth, which often accompanies moss.
    • Nutrient Imbalance: Soil deficient in essential nutrients like nitrogen, potassium, or magnesium cannot sustain healthy plant growth, leaving room for moss to take hold. Nutrient depletion may occur due to leaching from rainfall or inadequate fertilization.

    Inspection Method: Examine your lawn or garden for soft, green patches, particularly in shaded, damp, or compacted areas. These observations will guide your moss management strategy.

    Effective Identification Techniques

    Strategies for Monitoring Moss Presence

    • Seasonal Analysis: Moss growth often intensifies in spring and fall due to increased moisture and moderate temperatures (45-65°F). Document its seasonal patterns.
    • Soil Moisture Assessment: Dig a shallow hole (approximately 2 inches) in affected areas. Persistent wetness indicates drainage issues requiring correction.
    • Record-Keeping: Maintain a log of moss locations and interventions, such as increased sunlight exposure. Research indicates that enhancing light can reduce moss by up to 60%.

    Eliminating Moss: Proven Removal Techniques

    Manual Removal: Direct and Effective

    Physical removal is a straightforward approach to begin moss removal. Consider these methods:

    • Raking: Use a firm garden rake to extract moss from the soil surface. Divide the area into sections and rake in multiple directions to ensure thorough removal, taking care to minimize damage to grass or plant roots. Moss layers can reach an inch thick, suppressing underlying vegetation if not addressed.
    • Optimal Timing: Perform this task in early spring or fall when the soil is moist and temperatures range between 45-65°F, facilitating easier extraction.
    • Efficiency Aid: After raking, employ a leaf blower to remove loose moss debris, potentially reducing cleanup time by 30%, according to horticultural estimates.
    • Dethatching: For lawns, utilize a dethatcher or specialized rake to clear dead grass and organic buildup. This process enhances soil aeration and water penetration, disrupting moss’s foothold. Annual dethatching is recommended.

    Non-Chemical Solutions: Safe and Sustainable

    • Vinegar Application: Combine equal parts water and white vinegar, apply to moss with a sprayer, and allow it to sit for 15-20 minutes before raking. This method suits small areas and is compatible with organic gardening.
    • Baking Soda Treatment: Sprinkle baking soda over moss to dehydrate it and adjust soil pH. After 24 hours, remove the dead moss. Apply cautiously near plants to avoid excessive pH shifts.
    • Hot Water Method: Pour boiling water over moss in non-vegetated areas, such as pathways. Once it browns, scrape it away. This is a simple, chemical-free option.

    Chemical Control: Targeted Moss Eradication

    For persistent moss, iron sulfate (ferrous sulfate) offers a potent solution. Mix 1-2 ounces per gallon of water and apply over 100 square feet. After 24 hours, when the moss turns brown, rake it out. Adhere strictly to product guidelines, especially near edible plants, to prevent soil contamination.

    Managing Moss in Organic Vegetable Gardens

    Protecting Your Organic Crops from Moss

    If you cultivate organic vegetables—such as carrots, lettuce, or peppers—moss can indicate conditions detrimental to their growth, such as excessive moisture or acidity. Address it with these tailored steps:

    • Enhancing Drainage: Incorporate sand or compost into garden beds to improve soil structure and prevent waterlogging. Raised beds, elevated 8-12 inches, are highly effective in consistently wet areas.
    • Balancing Soil pH: Test soil with a kit; if the pH falls below 6.0, apply lime or wood ash (approximately a 1/4-inch layer) to reach 6.0-6.8, optimal for most vegetables. Recheck after 30 days to confirm adjustments.
    • Increasing Sunlight: Trim overhanging branches or reposition shade-producing plants to ensure vegetables receive at least 6 hours of sunlight daily, a level that moss cannot tolerate.
    • Manual Extraction: Carefully remove moss by hand or with a trowel, avoiding disturbance to vegetable roots. Dispose of it away from the garden to prevent spore dispersal.

    Key Consideration: Nutrient-rich soil, fortified with compost or aged manure, supports vigorous vegetable growth, reducing moss’s ability to establish itself.

    Preventing Moss Recurrence

    Soil Optimization

    • Soil Testing: Conduct annual tests to monitor pH and nutrient levels. If pH is below 6.0, apply lime at a rate of 40 pounds per 1,000 square feet, or add compost to enhance fertility.
    • Aeration: Use a garden fork or mechanical aerator each spring to perforate soil, improving drainage and root access to oxygen.
    • Water Management: Provide 1 inch of water weekly, applied deeply but infrequently, to maintain soil health without encouraging moss.

    Maximizing Light and Airflow

    • Pruning Practices: Trim trees and shrubs in early spring or late fall to increase sunlight penetration. Remove low-hanging branches that obstruct light.
    • Airflow Improvement: Space plants appropriately and eliminate barriers to promote drying and deter moss.
    • Reflective Enhancement: Incorporate light-colored mulch or stones to reflect sunlight into shaded areas, further discouraging moss.

    Ongoing Maintenance: Ensuring Long-Term Success

    • Mowing Standards: Maintain grass at 2-4 inches in height, mowing weekly during the growing season. Avoid cutting too short, which stresses grass and invites moss.
    • Fertilization Schedule: Apply slow-release fertilizer to lawns in spring and summer; for gardens, use organic compost or manure to sustain nutrient levels.
    • Irrigation Timing: Water between 5-9 AM to minimize evaporation and reduce fungal growth risks, using a rain gauge to track totals.

    Strengthening Vegetation: Outcompeting Moss

    • Overseeding Lawns: After moss removal, distribute grass seed suited to your climate to thicken turf and prevent regrowth.
    • Soil Enrichment: Add compost or sand to garden beds to improve texture and nutrient content, fostering robust plant growth that resists moss.

    Conclusion: Achieving a Moss-Free Landscape

    Eliminating moss from your lawn and garden requires diligence, but the results—a healthy, attractive landscape—are well worth the effort. By understanding its causes, applying effective moss removal techniques, and maintaining optimal conditions, you can prevent its return. Begin today: assess your property, remove existing moss, and implement consistent care practices. With these measures, your lawn and garden will flourish, free from moss’s interference.

    What is moss, and why is it a problem for the lawn?

    Moss is a small, non-vascular plant that thrives in damp, shady conditions. It can be a problem for lawns because it competes with grass for space, light, and nutrients, leading to patchy and unhealthy grass growth.

    Can I prevent moss from growing in my lawn

    Yes, you can prevent moss by maintaining healthy grass, ensuring proper drainage, increasing sunlight exposure, and regularly aerating the soil.

    Is it safe to use moss killers around pets and children?

    Some moss killers are safe for pets and children once dry, while others may contain harmful chemicals. Always check the label for safety instructions and keep pets and kids away during application.

    How long does it take for a moss killer to work?

    The time it takes for a moss killer to work varies by product. Generally, you may see results within a few days to a couple of weeks. Follow the product instructions for specific timelines.

    Will removing moss damage my grass?

    If done carefully, removing moss should not damage your grass. Use a gentle raking technique to minimize harm to the grass underneath.

  • When to Plant Garlic: Seasonal Planting Guide

    When to Plant Garlic: Seasonal Planting Guide

    Garlic is a kitchen favorite, loved for its bold flavor and impressive health benefits. Whether you’re a beginner gardener or a seasoned pro, growing garlic in your backyard, garden, or even on a balcony is both rewarding and simple.

    This guide covers everything you need to know about when to plant garlic, including choosing the right variety, ideal growing conditions, planting steps, pest management, harvesting, and storage tips.

    Why Grow Garlic?

    Garlic adds a rich, savory taste to dishes like soups, sauces, and marinades. Beyond its culinary uses, garlic boasts health perks—think anti-inflammatory and antimicrobial properties that support heart health and immunity. Plus, it’s low-maintenance, making it perfect for anyone looking to grow their own food. Curious about when to plant garlic for the best results? Let’s dive in!

    Moreover, garlic is easy to grow and requires minimal care, making it an excellent choice for both beginners and experienced gardeners.

    Ideal Growth Requirements for Garlic

    To thrive, garlic needs the right balance of sunlight, temperature, moisture, and soil quality.

    Sunlight

    Garlic loves full sun—aim for at least 6 hours of direct sunlight daily. Pick a spot free from shade to ensure healthy growth throughout its 8-10-month cycle.

    Temperature

    Garlic grows best between 60°F and 70°F (15°C to 21°C). Hardneck varieties tolerate cold winters (down to 0°F or -18°C with mulch), while softneck types prefer milder climates.

    Moisture

    Keep soil evenly moist but not waterlogged. Water deeply once a week during dry spells, letting the top inch dry out between sessions. Good drainage is key to prevent bulb rot.

    Soil Fertility

    Garlic thrives in well-draining, nutrient-rich soil with a pH of 6.0-7.0. Mix in compost or manure before planting, and add a balanced fertilizer (like 10-10-10) in spring for robust bulbs.

    When to Plant Garlic: Timing Is Everything

    Fall Planting

    The best time to plant garlic in most regions—like Minnesota, Wisconsin, or New York—is fall, 4-6 weeks before the first frost (typically October to November). This gives roots time to establish before winter, leading to bigger bulbs by summer.

    Spring Planting

    In warmer zones (like North Carolina or Tennessee, zones 6-7), you can plant garlic in early spring. However, fall planting usually yields larger, tastier cloves.

    Choosing the Right Garlic Variety

    Your climate and taste preferences will guide your choice between hardneck and softneck garlic.

    Hardneck Garlic

    Perfect for cold climates, hardneck garlic has a stiff stalk and produces fewer, larger cloves with a bold flavor. Try varieties like ‘Purple Stripe’ or ‘Rocambole’ for a culinary kick.

    Softneck Garlic

    Ideal for milder regions, softneck garlic offers a flexible stem (great for braiding) and more cloves with a subtler taste. Popular options like ‘California Early’ or ‘Silverskin’ store well for up to 9 months.

    How to Plant Garlic: Step-by-Step

    Garlic is a fantastic crop that grows from cloves, not seeds, making it a straightforward choice for gardeners of all levels. Whether you’re starting in a garden bed, raised plot, or even a pot on your balcony, planting garlic is simple with the right approach.

    Timing is critical—knowing when to plant garlic (typically fall for most regions) sets the stage for success. This detailed garlic planting guide walks you through each step, with practical tips to ensure your cloves thrive and produce plump, flavorful bulbs by harvest time.

    Step 1: Select Quality Bulbs

    Choosing the right garlic bulbs is the foundation of how to grow garlic successfully. Go for organic bulbs from a trusted source like a local nursery or farmer’s market—store-bought garlic might be treated with chemicals to stop sprouting, which can ruin your efforts. Bigger cloves are your best bet; they’re packed with energy to grow into strong plants and larger bulbs.

    • Where to Buy: Look for organic garlic at nurseries, online seed suppliers, or local farms.
    • What to Pick: Choose firm, plump cloves—avoid soft, mushy, or moldy ones.
    • Variety Tip: Try ‘Rocambole’ for bold flavor or ‘Silverskin’ for long storage.

    Step 2: Break Apart Bulbs

    Once you’ve got your bulbs, it’s time to prep them for planting. Break the bulbs into individual cloves right before you plant—this keeps them fresh and ready to sprout. Handle them gently to avoid damaging the cloves, as cuts or bruises can invite rot or pests later.

    • When to Do It: Separate cloves on planting day, not earlier, to preserve freshness.
    • How to Handle: Use your fingers to gently pull cloves apart, keeping the papery skin on.
    • What to Save: Pick the biggest cloves for planting; use smaller ones in the kitchen.

    Step 3: Prepare the Soil

    Garlic loves loose, nutrient-rich soil that drains well, so prepping your planting area is key. Digging deep and adding organic matter gives roots the space and food they need to grow. A quick soil test can help you hit the perfect pH range, ensuring your garlic gets off to a strong start.

    • Loosen Up: Dig soil 12 inches deep with a shovel or fork for good root space.
    • Add Nutrients: Mix in 2-3 inches of compost or aged manure for fertility.
    • Check pH: Use a soil test kit (from garden stores) to aim for 6.0-7.0; adjust with lime (if too low) or sulfur (if too high).
    • Drainage Fix: If soil’s heavy or clay-like, add sand or build a raised bed.

    Step 4: Plant Cloves

    Now comes the fun part—getting those cloves in the ground! Proper spacing and placement help your garlic plants grow without fighting for resources. This step is where your garlic planting tips really pay off, setting the stage for a healthy crop.

    • Dig Holes: Make holes 2 inches deep, 4-6 inches apart, in rows 10-12 inches apart.
    • Position Cloves: Place each clove pointed-end up (sharp tip), flat-end down (base).
    • Cover Up: Fill with soil and press lightly to remove air pockets.
    • Stay Organized: Mark rows with stakes or string, especially for multiple varieties.

    Step 5: Water Lightly

    Watering after planting helps the soil settle around your cloves, but don’t overdo it—garlic hates being waterlogged. A gentle sprinkle is all it takes to kick things off, especially if you’re planting in fall, the best time to plant garlic for most climates.

    • How Much: Give about 1 inch of water—just enough to dampen the soil.
    • How to Do It: Use a watering can with a fine rose or a hose with a soft spray.
    • Watch Out: Avoid soaking the soil; check moisture over the next few days if it’s dry.

    Step 6: Mulch

    Mulching is like a cozy blanket for your garlic—it protects cloves, saves water, and keeps weeds away. This simple step is a must for garlic care, especially in colder regions where winter can be harsh on young plants.

    How to Apply: Cover evenly over the soil, but don’t pile it too thick—let the ground breathe.

    What to Use: Spread 2-3 inches of straw, shredded leaves, or chemical-free grass clippings.

    Why It Helps: Retains moisture, blocks weeds, and insulates against freezes.

    Caring for Garlic as It Grows

    Ongoing garlic care tips ensure a great harvest:

    Pest Check: Watch for issues and use natural remedies like neem oil.

    Watering: Maintain moist soil—1 inch weekly, adjusted for rain.

    Fertilizing: Add fertilizer in spring when shoots appear.

    Weeding: Hand-pull weeds to protect shallow roots.

    Pest and Disease Management In Garlic

    Protect your garlic plants from these threats:

    Common Pests

    • Aphids: Sap-suckers that yellow leaves. Use water blasts or insecticidal soap (85% effective).
    • Thrips: Tiny pests causing silver streaks. Trap them with sticky traps or treat with soap.

    Common Diseases

    Downy Mildew: Yellow leaves and mold. Improve airflow and skip overhead watering.

    White Rot: A fungus rotting bulbs. Rotate crops to avoid it.

    When and How to Harvest Garlic

    Harvesting garlic happens in mid to late summer (June-July) when one-third of the leaves brown. On a dry day, lift bulbs with a fork, brushing off soil without washing.

    Curing and Storing Garlic Tips

    After harvesting, hang your garlic in a dry, dark, and airy spot. Braiding softneck garlic or tying hardneck garlic in bunches helps them dry evenly. Let them cure for 2-4 weeks, and you’ll know they’re ready when the outer skins feel dry.

    Once they’re cured, store the garlic in a cool, dark place like a pantry or cellar. The temperature should be around 60°F to 65°F (15°C to 18°C). Use mesh bags or baskets so air can flow and stop moisture from building up.

    Cooking & Medical Notes For Garlic Plant

    Freshly harvested garlic can enhance the flavor of many dishes. You can use raw garlic for dressings or dips for a strong, pungent flavor. If you have excess garlic, consider preserving it by freezing or pickling. Properly stored, pickled garlic can last for up to a year in the fridge, offering a tangy addition to salads, sandwiches, and sauces.

    Did you know that raw garlic contains a compound called allicin, which is responsible for its sharp flavor and many health benefits? Studies show that consuming 1-2 cloves of raw garlic per day may help boost immune function and improve heart health. It’s awesome for us all!

    Interesting Facts

    Garlic is a low-calorie, nutrient-dense food. Just 28 grams of garlic contains:

    • 23% of the RDI (Recommended Dietary Intake) for Manganese
    • 17% of the RDI for Vitamin B6
    • 15% of the RDI for Vitamin C Plus, it’s packed with antioxidants and other compounds that help fight inflammation and infections.

    Growing Garlic in Pots

    If garden space is limited, you can successfully grow garlic in pots. Choose a container that is at least 12 inches deep and wide to provide adequate root space. Ensure the pot has drainage holes to prevent waterlogging.

    Fill the container with well-draining potting soil mixed with compost. Plant the cloves 2 inches deep with the pointed end facing up, spacing them 4-6 inches apart.

    Monitor soil moisture and water when the top inch feels dry. Position the pot in a sunny location that receives at least 6 hours of direct sunlight each day.

    Decoration with Garlic Plant

    Garlic isn’t just for cooking; it can also make your home look nice! You can braid garlic bulbs together, and they not only look beautiful but also smell great. Hang them in your kitchen to give it a cozy, rustic feel, or place them in a bowl on your dining table as a cool centerpiece.

    Plus, in spring, garlic grows curly flower stalks called garlic scapes. These can be used in flower arrangements for a fun, fresh look. Their unique shape and green color make them a perfect choice for decorating your home while keeping it natural and simple!

    Conclusion

    Mastering when to plant garlic—fall for most, spring for warm zones—unlocks a harvest of flavorful bulbs. With the right garlic varieties, soil prep, and garlic care tips, you’ll enjoy homegrown garlic that outshines store-bought. Start your garlic planting journey today with daily gardening info!

  • Hello world!

    Welcome to WordPress. This is your first post. Edit or delete it, then start writing!